
Building your own 5-inch freestyle FPV drone doesn’t have to cost a fortune. In fact, with the right parts and smart component choices, you can build a powerful freestyle quad for under $200 that still delivers solid performance, durability, and upgrade potential.
In this 2026 budget FPV build guide, we’ll show you how to assemble a reliable freestyle drone using proven components like the SpeedyBee F405 V4 stack and MEPS Neon 2306 motors—a setup capable of smooth freestyle tricks, fast punch-outs, and stable flight.
This build is ideal for:
- Beginners learning to build their first FPV drone
- Pilots wanting a low-cost freestyle backup quad
- Budget-focused builders who still want reliable performance
Let’s break down the parts and see how this sub-$200 freestyle drone build comes together.
👉 Explore FPV drone parts on MEPSKING to build the cheapest FPV drone.
Under $200 Budget FPV Freestyle Drone parts
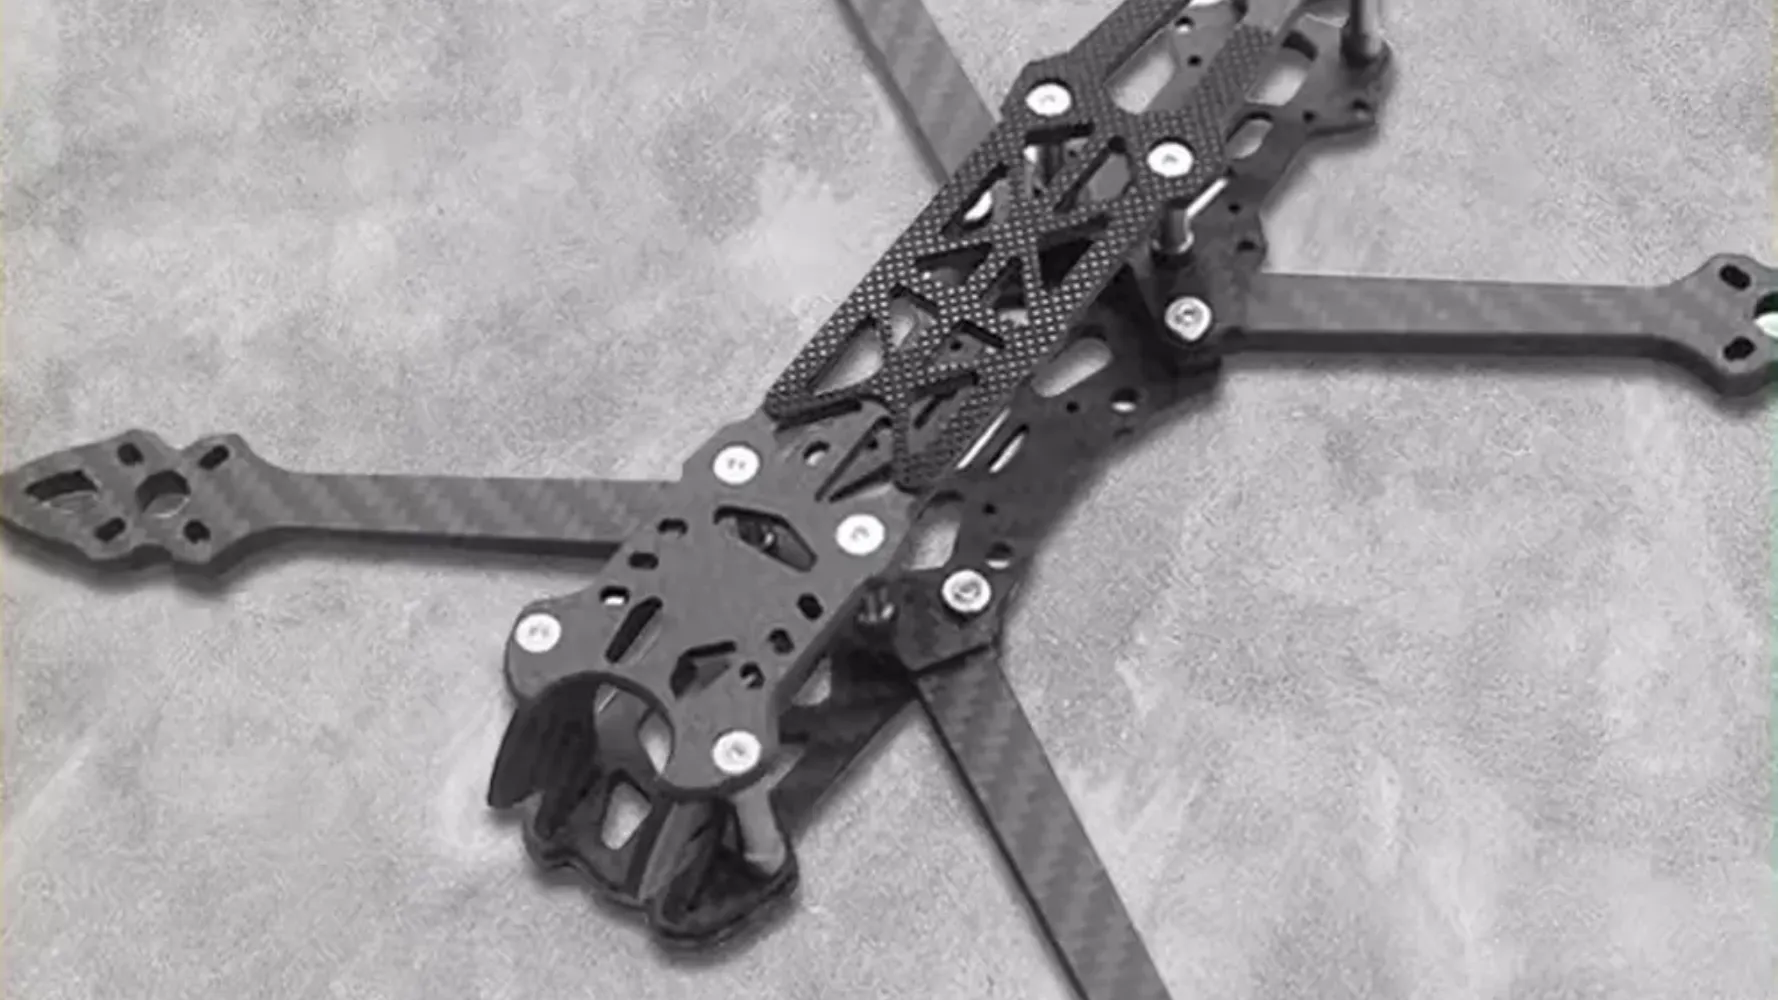
- Frame: MAK4 5-inch Freestyle Drone Frame $33.99
- FC and ESC Stack:Speedybee F405 V4 & 55A ESC $65.99
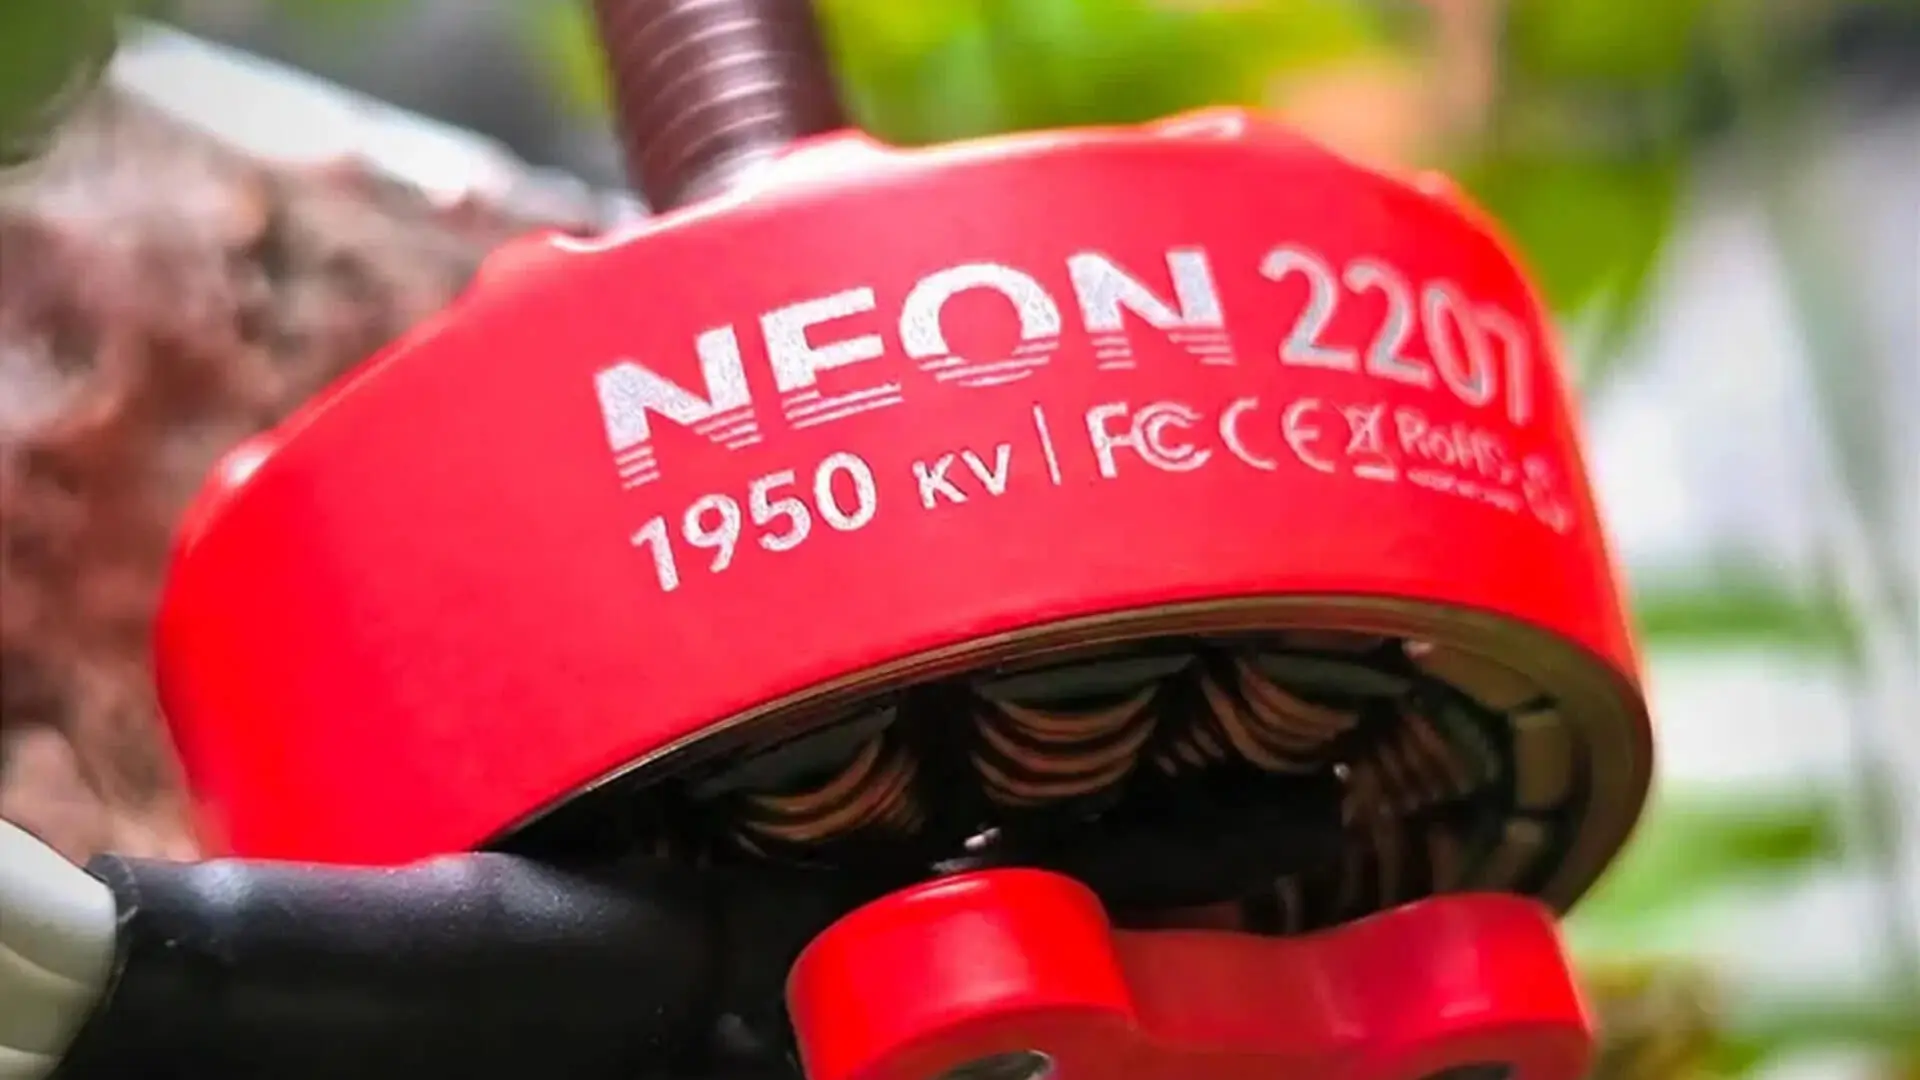
- Motors:4x MEPS Neon 2306 $38.63
- VTX: Eachine TX805 $13.00
- FPV Camera: Foxeer Razer Micro $17.99
- Receiver: Bayck ELRS RX $9.60
- Propellers: MEPS SZ5145 8Pcs $4.90
| Component | Description | Price (USD) |
|---|---|---|
| Frame | MAK4 5-inch Freestyle Drone Frame | $33.99 |
| FC + ESC | Speedybee F405 V4 & 55A ESC | $65.99 |
| Motors | 4x MEPS Neon 2306 | $38.63 |
| VTX | Eachine TX805 | $13.00 |
| Camera | Foxeer Razer Micro | $17.99 |
| Receiver | Bayck ELRS RX | $9.60 |
| Propellers | MEPS SZ5145 | $4.90 |
| Total | $184.1 |
This setup stays comfortably under the $200 budget while still using reliable parts that many FPV pilots already trust.

If you want a guide on different budgets for FPV drones, you can come to read this article: Choosing the Right FPV Drone for Different Budget: From Beginner to Pro
Performance and Suitability of Each Component
This setup stays comfortably under the $200 budget while still using reliable parts that many FPV pilots already trust.
Frame: MAK4 5-inch Freestyle Drone Frame(US$33.99)
The MAK4 frame is widely known in the FPV community as a durable and beginner-friendly freestyle frame. Its simple layout makes building easier, while the thick carbon arms provide good crash resistance.
Why It Works Well
- Durable carbon fiber arms
- Easy access for repairs and maintenance
- Simple layout for beginners learning to build
For a budget freestyle drone, durability is crucial—and the MAK4 frame delivers that without increasing the cost.
FC and ESC Stack: Speedybee F405 V4 & 55A ESC (US$65.99)
The SpeedyBee F405 V4 stack is one of the best budget stacks available today. It combines a capable F405 flight controller with a powerful 55A ESC, giving this build plenty of headroom for aggressive flying.
Advantages
- Reliable F4 processor for Betaflight
- 55A ESC handles powerful motors easily
- Bluetooth configuration via SpeedyBee App
- Great balance between price and performance
For freestyle builds, a strong ESC is important because fast throttle punches and high-RPM prop spins can quickly stress weaker ESCs.
Motors: 4x MEPS Neon 2306 (US$38.63)
The MEPS Neon 2306 motors are the power source behind this build. The 2306 stator size is widely considered one of the best motor sizes for 5-inch freestyle drones.

Advantages
- Excellent thrust-to-weight ratio
- Strong mid-throttle control for freestyle tricks
- Smooth and predictable throttle response
These motors provide enough power for:
- power loops
- split-S maneuvers
- fast freestyle lines
while still maintaining good efficiency.
VTX: Eachine TX805 (US$13.00)
The Eachine TX805 is one of the most popular budget analog video transmitters.
Key Features
- Adjustable power output: 25mW–800mW
- Wide compatibility with analog FPV goggles
- Affordable but reliable
At 800mW, this VTX can easily support medium-range freestyle flying while keeping the overall build cost low.
FPV Camera: Foxeer Razer Micro (US$17.99)
The Foxeer Razer Micro is a solid analog FPV camera known for its low latency and good color performance.
Why It’s Good for Freestyle:
- Clear video feed for fast flying
- Good dynamic range in outdoor environments
- Lightweight micro form factor
For analog setups, Foxeer cameras are still among the most trusted options in the FPV community.
Receiver: Bayck ELRS RX (US$9.60)
The Bayck ELRS receiver brings modern radio link technology to this budget build.
ExpressLRS offers:
- extremely low latency
- excellent control range
- strong signal stability
Even though it’s inexpensive, this receiver supports ELRS protocol, making it a great value option.
Propellers: MEPS SZ5145 8Pcs (US$4.9)
The MEPS SZ5145 tri-blade propellers provide the thrust needed for freestyle maneuvers.
Advantages:
- Strong grip in corners
- Smooth throttle response
- Durable material for crashes
Tri-blade props are the standard choice for freestyle because they provide better control authority compared to dual-blade props.
Why This Build Works
- Freestyle-Capable Performance
With its 2207 motors, solid ESC, and tri-blade props, this build is tuned for freestyle flow. You’ll get snappy throttle response, predictable cornering, and enough power for acro tricks.
- Beginner and Budget Friendly
Totaling just under $200, this build makes FPV accessible without major compromise. All parts are reliable, available, and easy to set up—making it a great first drone or budget backup.
- Upgradable in the Future
Running analog now doesn’t mean you can’t upgrade. The frame supports HD systems like DJI or Walksnail, and the flight controller has enough UARTs for GPS or buzzer additions.
Flight Recommendations
- Battery: 4S 1300–1500mAh or 6S 1100–1300mAh
- Firmware: Betaflight 4.4+
- Prop Setup: 5″ tri-blade (recommended), or test dual-blade for more efficiency
- Rates/PIDs: Start with Betaflight presets and adjust based on your flying style
- Accessories: Consider adding a buzzer and a capacitor for safety and performance
FPV Build Tools List (Essential Tools for Building and Tuning FPV Drones)
If you’re building or tuning an FPV drone and experimenting with protocols like DSHOT300 vs DSHOT600, having the right tools makes the process much easier and safer.
Here are the essential tools every FPV pilot should keep in their workbench.
Soldering Iron
A high-quality soldering iron is the most important tool for FPV builds.
You’ll use it for:
- soldering ESC signal wires
- installing motors
- connecting battery leads
- repairing damaged components
Temperature-controlled irons (such as TS100-style irons) help prevent damage to delicate flight controller pads.
Precision Hex Drivers
Most FPV frames and motors use M2 or M3 screws, so a set of precision hex drivers is essential.
Recommended sizes:
- 1.5mm
- 2mm
- 2.5mm
Quality drivers make assembly easier and prevent stripping screws.
Smoke Stopper
A smoke stopper protects your electronics during the first power-up after a build.
If there is a short circuit, the smoke stopper will limit current and prevent components like:
- ESCs
- flight controllers
- VTX units
from burning out.
Multimeter
A multimeter is extremely useful for troubleshooting electrical issues.
You can use it to:
- check for short circuits
- measure voltage output
- test battery health
- diagnose ESC wiring problems
It’s one of the most valuable diagnostic tools for FPV pilots.
FPV Drone Build Tips
If this is your first build, these tips can save you from common mistakes.
Use a Smoke Stopper
Always power your drone with a smoke stopper during the first startup to prevent damage if something is wired incorrectly.
Secure Your Wiring
Use:
- zip ties
- electrical tape
- double-sided foam tape
to prevent wires from touching spinning motors or propellers.
Soft-Mount the Flight Controller
Soft-mounting helps reduce gyro noise, which improves flight stability and tuning.
Enable RPM Filtering
RPM filtering in Betaflight significantly improves flight smoothness and helps reduce prop wash oscillations.
Always Check Prop Direction
Before the first flight, confirm that:
- motors spin correctly
- propellers match motor direction
Incorrect props are one of the most common causes of crashes during maiden flights.
Frequently Asked Questions (FAQ)
Q1: Is this drone beginner-friendly?
Yes. This build uses commonly available components and a simple frame layout, making it ideal for pilots building their first freestyle drone. The wiring is straightforward, and most parts are well supported by Betaflight.
Q2: Can I fly this drone on 6S?
Yes. The SpeedyBee F405 V4 stack and MEPS Neon 2306 motors are fully compatible with 6S batteries. However, beginners may want to start with 4S packs first to make throttle control easier.
Q3: Can I upgrade to HD video later?
Yes. The MAK4 frame supports HD systems. You can switch to DJI O3, Walksnail, or HDZero when your budget allows.
Q4: What’s the flight time on this build?
With a 4S 1500mAh battery, expect 4–6 minutes depending on your flying style. Lighter props or smoother flying can stretch that longer.
Final Thoughts: High Performance Without High Prices
This $193 freestyle FPV build proves that you don’t need top-dollar gear to fly smooth lines and throw down tricks. With the right parts and proper setup, you’ll have a drone that performs well, survives crashes, and grows with your skills.
Whether you’re just starting in FPV or looking for an affordable backup quad, this build delivers real performance on a tight budget.
If you enjoy experimenting with budget freestyle builds like this one, you may also be a great fit for the MEPSKING Vine Voice. This official reviewer initiative gives skilled FPV pilots early access to upcoming MEPS motors and components, allowing them to share real freestyle flight feedback—such as throttle response, momentum control, and overall feel—to help refine future product designs.
For pilots who care deeply about flow, control precision, and consistency in sub-$200 builds, it’s an excellent opportunity to contribute to the FPV community.
