
You need to take good care of the FPV drone device you own if you want to effectively maintain your hobby. Are you interested in learning how to clean an FPV drone? Are you seeking some quick and simple solutions to improve the machine’s performance and longevity? FPV drones require routine cleaning to maintain minimum functional concerns over time. I’ll go over the supplies you’ll need to clean a quadcopter in this article. I’ll also go through how to do it and when you should think about cleaning at the same time. If you wish to securely clean a quadcopter, keep reading.
How often is Maintenance FPV drone Necessary?
There is no universal schedule because flying styles and environments vary greatly. However, a practical guideline almost all experienced pilots follow looks like this:
- After every flying session:
Perform a quick inspection to look for loose screws, bent props, mud on the lens, or grass stuck around the motors. This takes under a minute but prevents a lot of unnecessary issues. - Every 2–3 sessions:
Perform a light cleaning—blow out dust with canned air, wipe the camera lens, check motor smoothness, and inspect frame integrity. This helps you catch problems before they turn into mid-air failures. - Every month:
Perform full maintenance, especially if you fly often. This includes deeper frame cleaning, bearing checks, checking battery internal resistance, and cleaning the FC/ESC area.
If you fly in harsher conditions—wet grass, dusty fields, sand, or abandoned buildings—you should shorten the maintenance interval. Dirt buildup and moisture are two of the biggest contributors to premature motor failure and unstable flight performance, so consistency is more important than perfection.
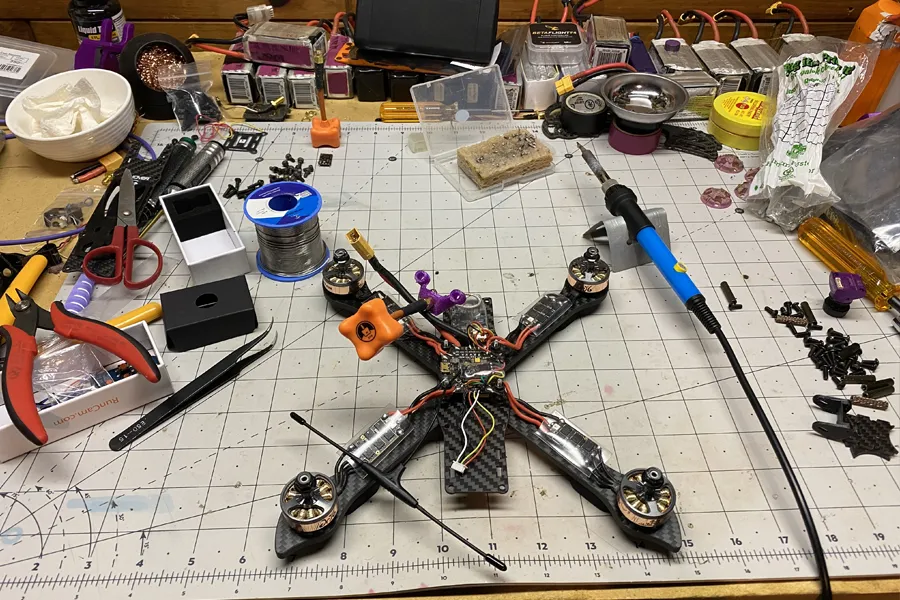
The Tools You Need to Clean Your FPV Drone
Having the right tools makes cleaning safer and faster. Here is a more detailed explanation of each tool and why it helps:
- Soft cleaning brushes:
Different sizes allow you to reach between standoffs, under motor bells, and between FC and ESC boards. Hard brushes can scratch components, so soft bristles are preferred. - Isopropyl alcohol (90%–99% IPA):
One of the safest cleaning solutions for FPV electronics. It evaporates quickly and removes grass stains, bugs, mud, and even sticky residue from battery pads. - Compressed air:
Blasts dust out of tight areas such as motor bells, ESC heat sinks, and the gaps between flight controller soft mounts. Safe when used in short bursts. - Microfiber cloth:
Ideal for wiping carbon fiber surfaces, GoPro mounts, or VTX casings without leaving scratches. - Cotton buds:
Perfect for cleaning small areas like camera lenses, USB ports, or between motor stator gaps. - Paper towels:
For wiping down frames and electronics, though, be careful near solder joints. - Lubricant (bearing-safe):
Motors, especially racing motors, endure thousands of RPM. A tiny drop of lubricant can extend bearing life significantly. - Screwdrivers, Allen keys, and long-nose pliers:
Essential for removing standoffs, tightening frame screws, and pulling out debris that cannot be blown away.
Having a small “field maintenance kit” in your backpack ensures you can handle minor issues anytime.
Step-by-Step FPV Drone Cleaning and Maintenance
Remove Dust and Dirt Buildup
Dust, loose grass, and fine debris often accumulate around the motors, flight controller, and VTX heat sink. These can trap heat or cause electrical issues.
Start by using canned air to remove the loose debris. Blow air through the motors from multiple angles, especially if you fly on sandy or grassy fields. Then gently wipe the frame with a microfiber cloth and alcohol. For deeper cleaning, remove the top plate to access the electronics stack.
Taking your time at this stage ensures you’re not trapping dust under the frame, which can later interfere with airflow or cooling.
Frame Inspection & Cleaning
Examine your frame for cracks, twists, damaged parts, worn battery straps, twisted standoffs, and other unusual conditions. Check the tightness of each screw. Fix any slack screws and, if necessary, use a thread locker.
- For the majority of areas, use a dry-bristled brush, such as a paintbrush or toothbrush.
- Use an air compressor for confined spaces.
- Then, clean the area with a brush dampened with water or, better yet, isopropyl alcohol, which is non-conductive and less likely to corrode or damage electrical components.
- Loose or stripped screws
- Bent aluminum standoffs
- Torn battery straps
- Battery pad detaching
- TPU parts worn out or split
Be aware that even after this repair, the carbon part won’t be as structurally sound as a brand-new one. To keep the frame in a condition that is suitable for flight, any frame components that appear to have sustained severe damage or weakness should be replaced. When the frame is unable to sufficiently protect the central electronics, it can result in more expensive crashes if damaged frame components are not replaced.
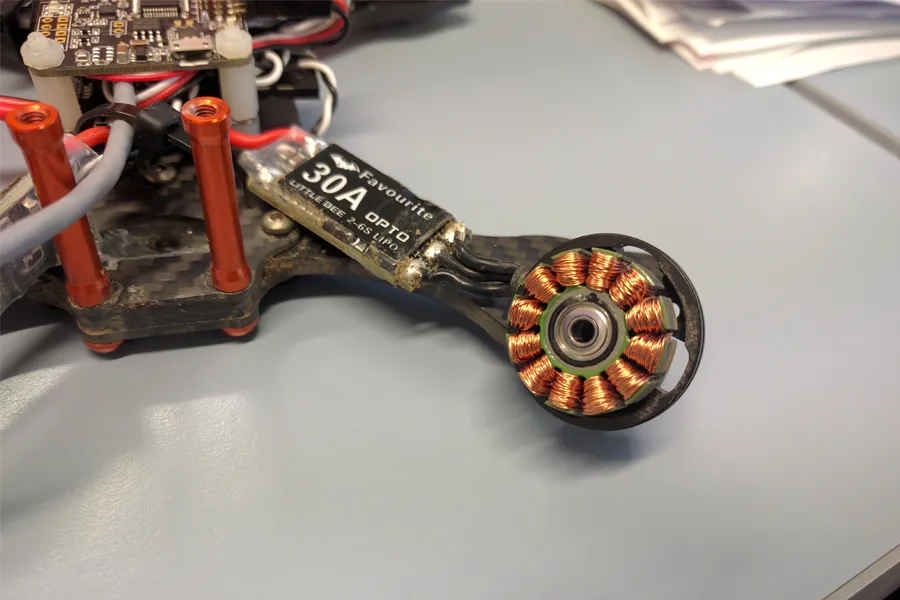
Motor Cleaning and Maintenance
Motors endure the most stress. Dirt inside the bearings or a slightly bent shaft can cause heat, noise, and inefficiency.
- Motor vibration: Run the motors when the drone is armed, and make sure the propellers are off. Next, feel the vibrations in each motor with your fingernail. It could be bent on the motor shaft if it vibrates excessively.
- Free spinning: To check for rotational friction, manually rotate each motor. Compare the friction to a spare or brand-new motor. A non-compliant motor will require replacement, cleaning, or lubrication of the bearings.
- Shaft straightness: A bent motor shaft is not what you want. Examine the shaft’s straightness after disassembling the motor. It must be replaced with a new one if it is bent.
- Shaft play: Make an effort to wriggle the motor bell radially. Little compliance should exist in the longitudinal (side-to-side) direction. Like the play to a brand-new motor. Replacement of the bearing or motor should be taken into consideration if the play is much more than that of a new motor.
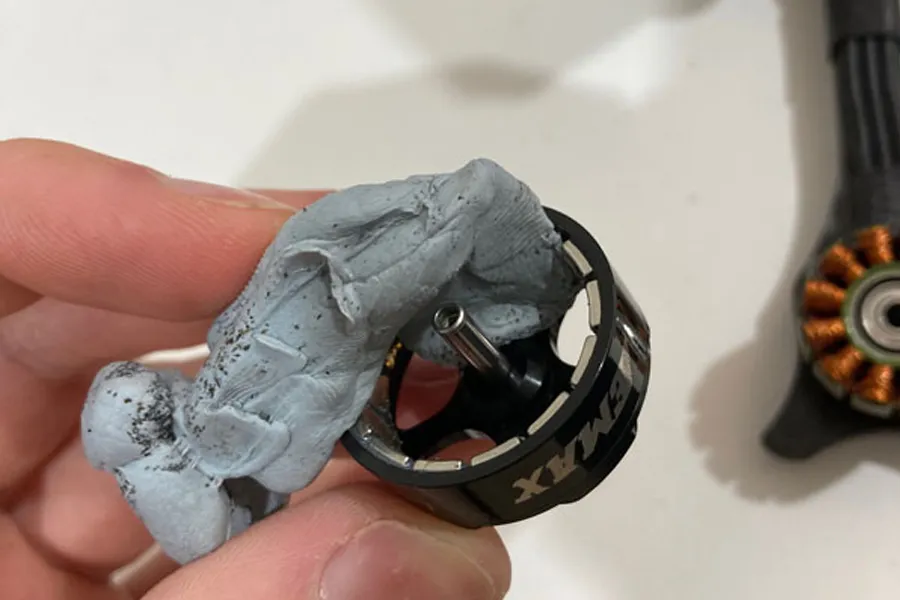
- Inner parts: Verify whether the magnets are firmly fastened to the motor bell and whether they appear to be broken. If any of those don’t appear to be correct, replace your motor. To remove any debris stuck to the motor bell, use canned air or blue tack.
- Screw torque: Verify the motor screws are snugly fastened. Apply thread locker and secure any screws that came loose during flight.
- Bearing: Put the bearings in an ultrasonic cleaner to clean them if they have significant friction or appear to be corroded or dirty.

LiPo Battery
LiPo batteries degrade naturally over time. A damaged or poorly maintained pack can puff, sag, or even catch fire.
Battery age
The battery’s age is the first thing to check. I would strongly advise beginning FPV drone maintenance if you have never done it before. Because batteries degrade with time and lose their ability to discharge quickly, it’s crucial to distinguish between new and used packs. Older packs should be utilized for practice, while newer packs should be used during racing to maximize performance.
Cell balance
The second step is to verify that each cell on your battery packs is balanced using your charger or a LiPo battery meter. You must use your charger to balance your battery pack if any of the cells are out of balance. However, if the battery is consistently falling out of balance, it might be best to discard it.
Internal resistance (IR)
What’s more, every battery also has its own internal resistance. The internal resistance of the battery rises with each use. When a battery empties, one with a high internal resistance loses more energy as heat rather than using it to recharge your drone. Because of this, a battery with a high internal resistance heats up more quickly and has a shorter range. As a result, you should use a battery tester to evaluate the internal resistance of your battery. If it becomes too high for your battery to function properly, replace the LiPo.
Physical condition
Look for:
- Puffiness
- Cracked heat shrink
- Bent connectors
- A broken balance leads
If the pack swells or smells sweet, discard it safely.
Propellers
Propellers play a major role in flight stability. Even slight deformation or debris buildup can cause oscillations.
Steps:
- Remove props after each session if possible
- Clean with IPA to remove grass stains and dirt
- Inspect for micro cracks around the hub
- Replace any prop that is bent or chipped
Well-maintained props significantly reduce motor load and improve flight smoothness.
Camera Lens
As you fly, your camera lens gets dirty, especially if you have your props in. Utilize this time to clean your camera’s lens. Mix alcohol and water one to one. Use the cotton bud to gently wipe the lens after soaking it in the diluted alcohol. If cotton sticks to the lens, blow it off.
After using the FPV drone for a specific amount of time, you must adhere to a straightforward rule and think about cleaning. Undoubtedly, high-quality drones are long-lasting, but it does not mean that a buildup of dirt and debris won’t affect how well your drone performs. The motor must work harder to function well if there is a buildup of dust.
A similar problem could also obstruct the air and impair performance. By keeping your drone clean on a regular basis, you may prevent these issues. After achieving a goal, you can always clean it.
However, you should think about cleaning the drone right away if you see dirt and dust buildup on any part of it. And if you put off cleaning for a while, it may not only affect how well the drone works but also make cleaning more difficult and time-consuming. To avoid any harm, act wisely, clean frequently, and use secure cleaning supplies and equipment.
If you’re looking to upgrade your drone with better motors, stacks, or other components, join our program. The MEPSKING VINE VOICE initiative allows FPV pilots to apply for free products, share authentic usage experiences, and help brands optimize hardware based on long-term performance. Click the image below to learn more.

FAQ: FPV Drone Cleaning & Maintenance
1. How often should I clean my FPV drone?
Light cleaning after every 2–3 sessions and a deep cleaning every month is ideal. Clean immediately after flying in wet grass, dust, or sand.
2. Can I wash my FPV drone with water?
No. Water can enter electronics and cause corrosion. Only use isopropyl alcohol for cleaning.
3. What is the safest way to clean motors?
Use compressed air for dust, and clean bearings with an ultrasonic cleaner if necessary. Never soak the entire motor in liquid.
4. How do I know if a motor bearing is damaged?
If the motor feels gritty, makes noise when spinning, or heats up quickly, the bearings may need to be replaced.
5. Does cleaning improve flight performance?
Yes. Clean motors and props significantly reduce vibration and improve PID tuning stability.
6. How do I clean a muddy or wet FPV drone after a crash?
Remove the battery immediately, dry the drone thoroughly, use IPA to remove moisture or mud, and avoid powering it on until fully dry.
7. What should I do if my battery becomes puffy?
Stop using it immediately. Puffy LiPo packs are dangerous and should be disposed of properly.
8. Should I oil my FPV motors?
Only apply a very small drop of bearing oil to the bearings—not on the magnets or shaft.