
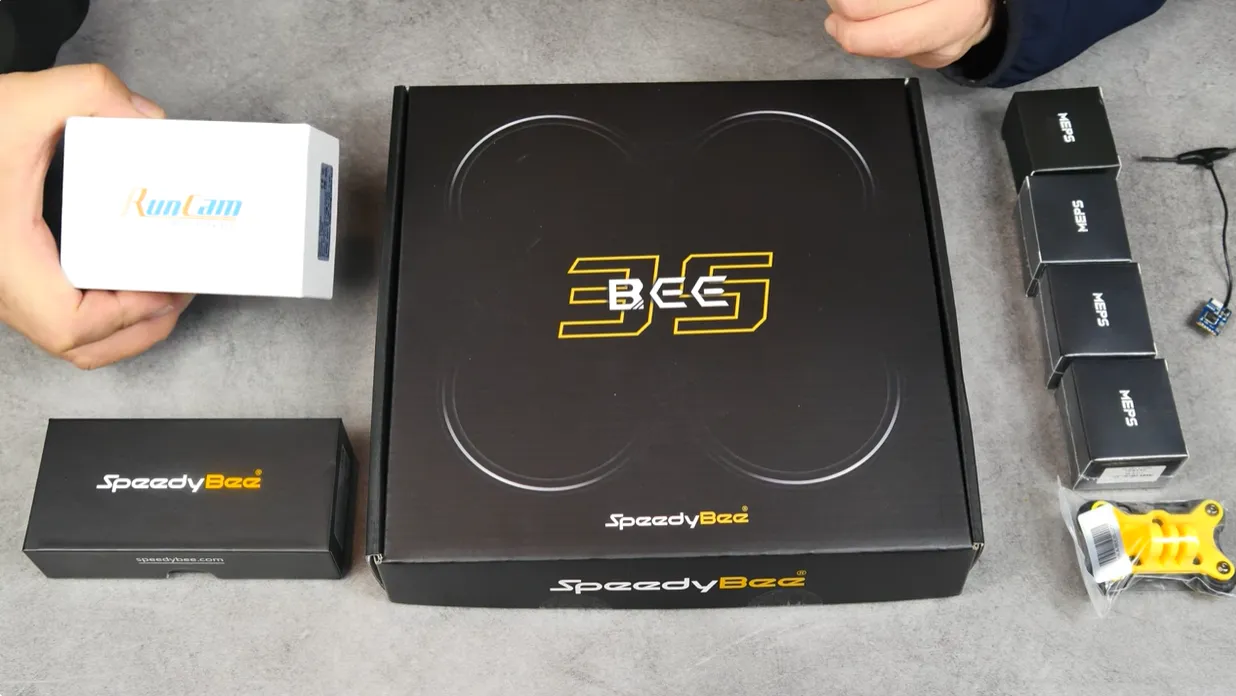
Building a cinewhoop drone starts with choosing a solid cinewhoop frame like the SpeedyBee Bee35, pairing it with reliable MEPS SZ2004 motors, and configuring it in Betaflight. This step-by-step guide walks you through assembly, wiring, and setup so you can create one of the best cinewhoop options for stable cinematic footage.
Part List (Recommended Setup)
- Frame: SpeedyBee Bee35 3.5-Inch Cinewhoop Frame
- Motors: MEPS SZ2004 Motor for 3.5″ Cinewhoop Drone
- Stack (FC + ESC): SpeedyBee F405 Mini BLS 35A 20×20 Stack
- Camera & VTX: RunCam Link Phoenix
- Receiver: RECEPTOR ELRS GEPRC NANO ( 2.4GHZ PA100)
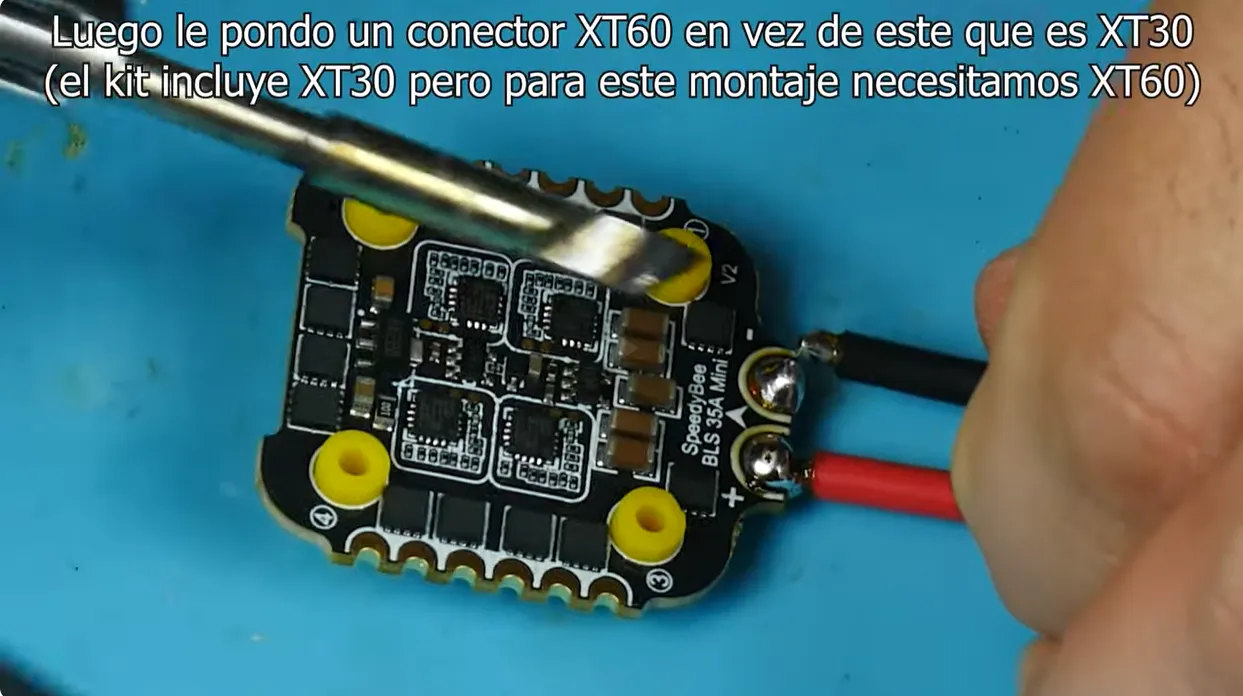
- Battery Plug: XT60
- Propellers: 3.5″ tri-blades (more pitch if carrying GoPro)
Tools You’ll Need
- Allen Wrenches: 2.0mm and 1.5mm (for frame and motor screws)
- Soldering Iron: TS100 or equivalent
- Solder & Flux: For clean, solid joints
- Heat Shrink Tubes & Electrical Tape: Cable protection
- USB Cable: For Betaflight connection
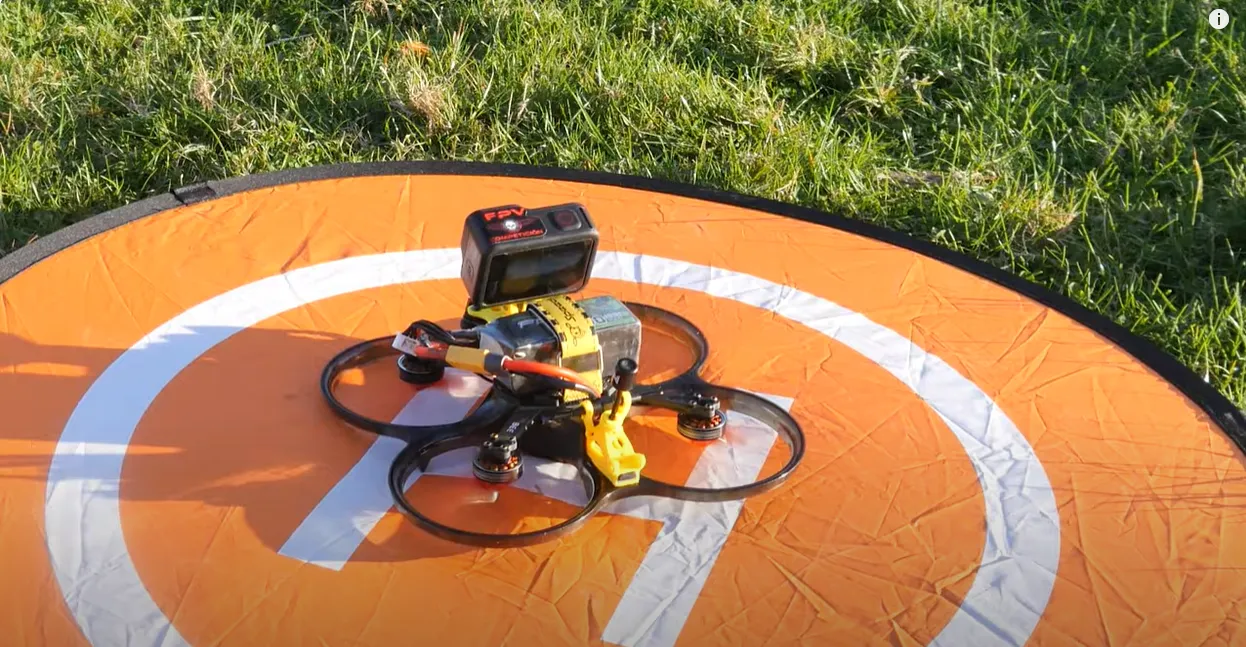
Initial Impressions and Flight Test
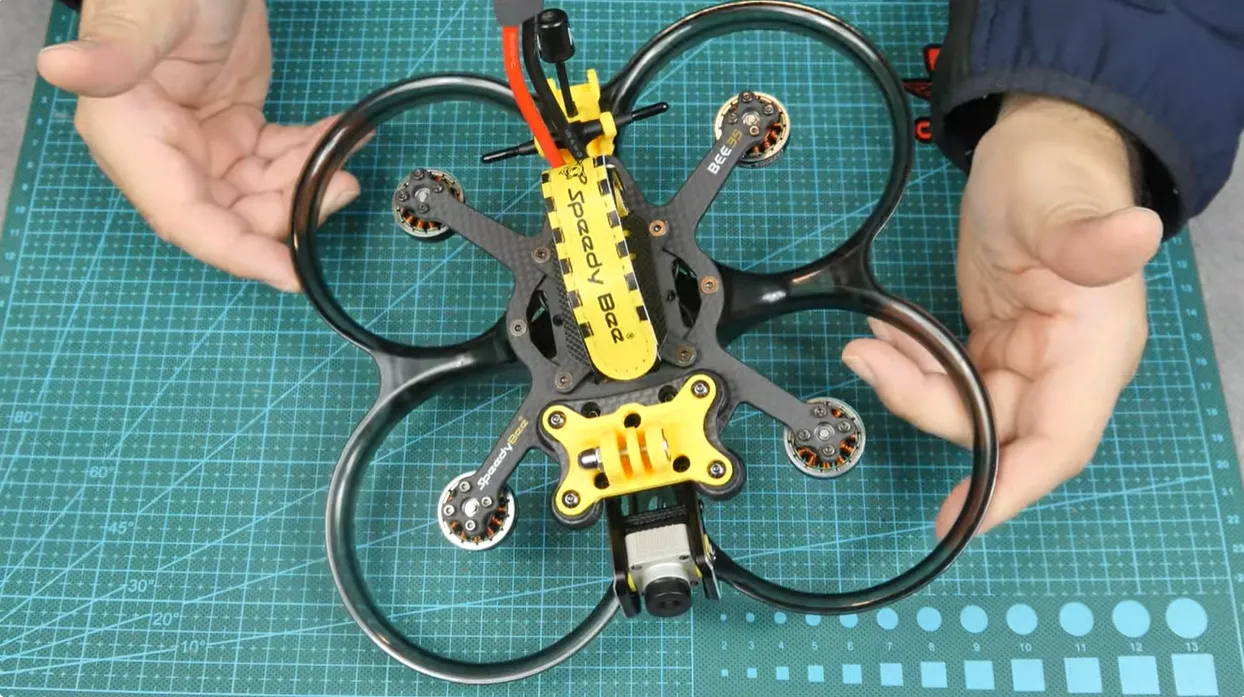
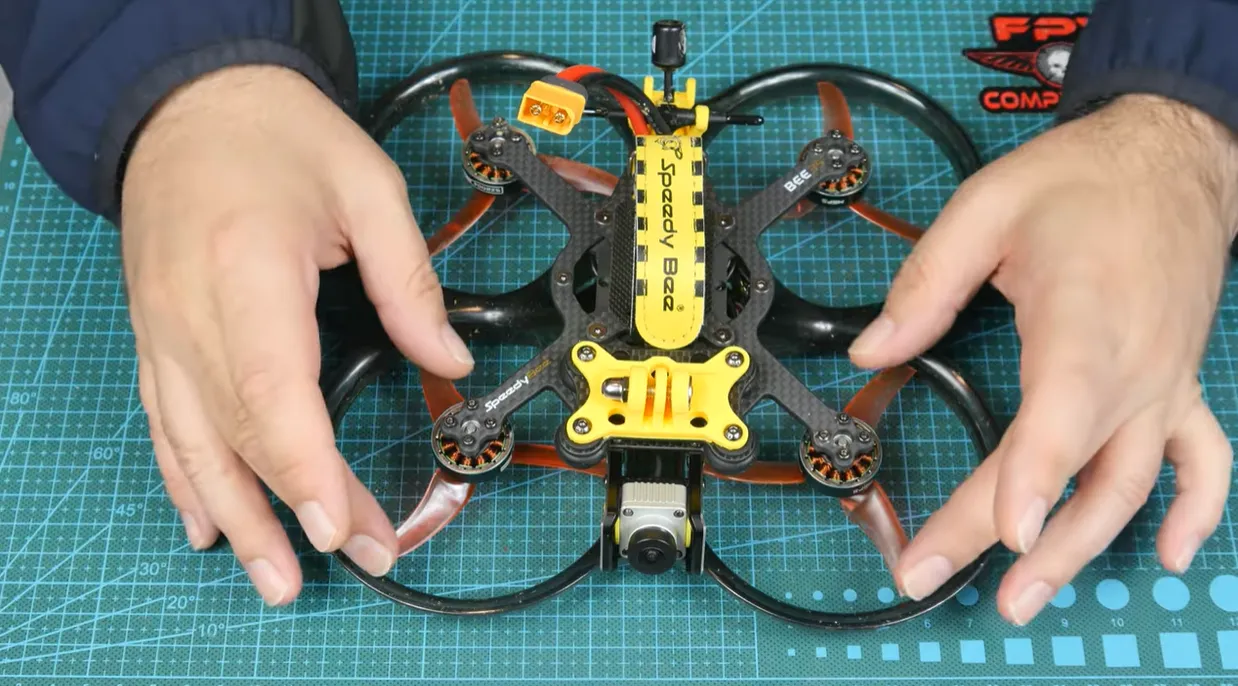
The Bee35 cinewhoop frame feels sturdy and well thought-out. With ducts for safety and vibration-damping TPU, it’s an ideal base for building a reliable cinewhoop drone. In flight tests, the quad felt locked-in and agile, especially without a GoPro. Once you add a GoPro, switching to higher-pitch props helps balance agility and payload.

Step-by-Step Build Guide
Gathering Components
For our build, we require a frame, in this case, the Speedyb35, alongside matching electronics from the same brand for the controller and ESC, known as a stack. Additionally, we’ll need an FPV video system compatible with DJI, MEPS 2004 motor, an LRS receiver, and propellers.
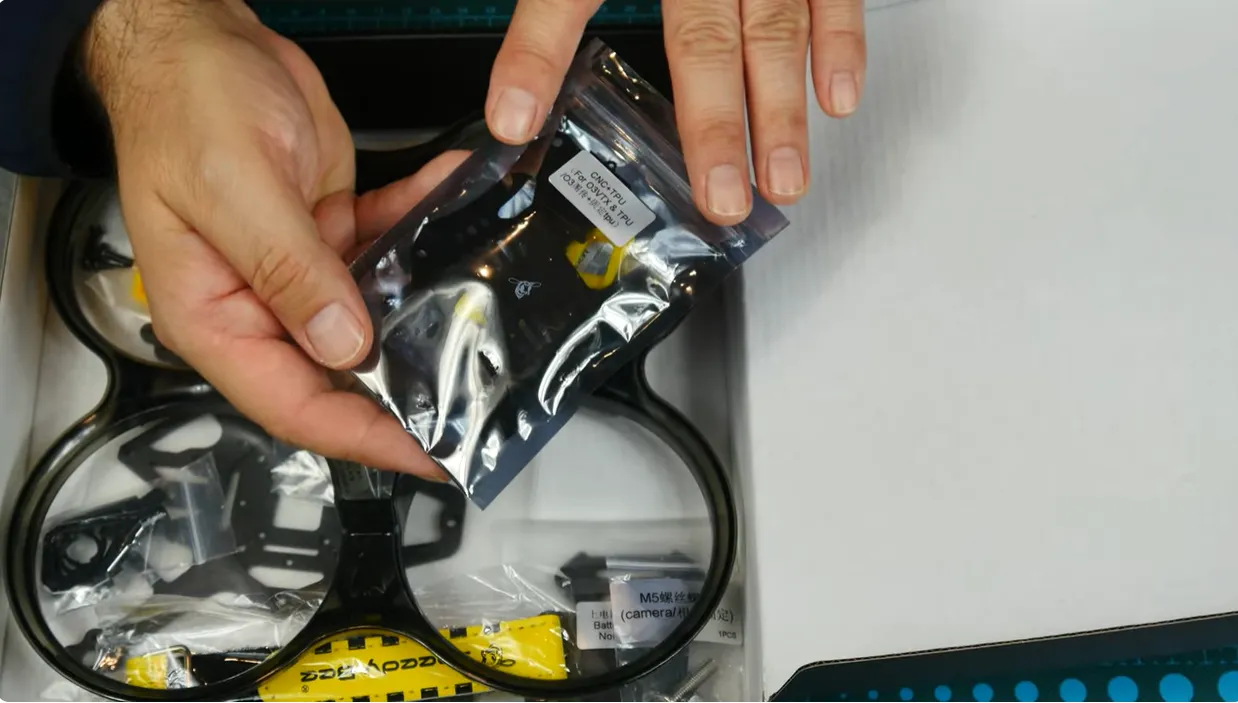
Frame Assembly
The assembly process starts with the frame. We’re working with the Speedyb35, a budget-friendly option that doesn’t skimp on quality. After unboxing, we find comprehensive assembly instructions, various TPU parts for damping and customization, and all necessary screws and mounts.
- Start with the SpeedyBee Bee35 cinewhoop frame.
- Secure the ducts, standoffs, and TPU bumpers.
- Ensure everything is tightened evenly to reduce vibrations.
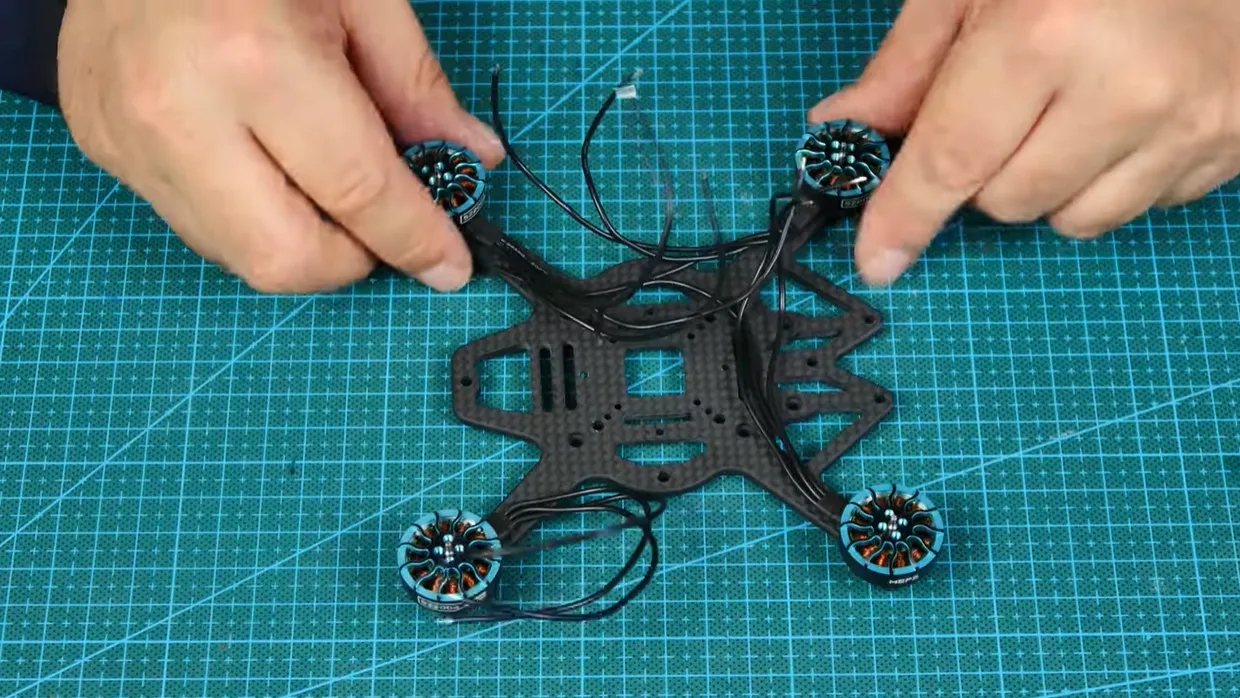
Mounting the Motors
Next, we attach the MEPS 2004 motor, using the provided screws to secure them to the frame. It’s crucial to arrange the wires neatly and trim them to length before soldering them to the ESC, following the correct order for optimal performance.
- Install MEPS SZ2004 motors with the included screws.
- Trim and solder wires neatly to the ESC pads.
- Keep wiring short for less resistance and cleaner signals.
Installing the ESC & Flight Controller
We begin by soldering the XT60 battery connector to the ESC, ensuring a strong connection for power delivery. This step requires careful soldering, especially with thicker wires, to ensure a secure and reliable connection.
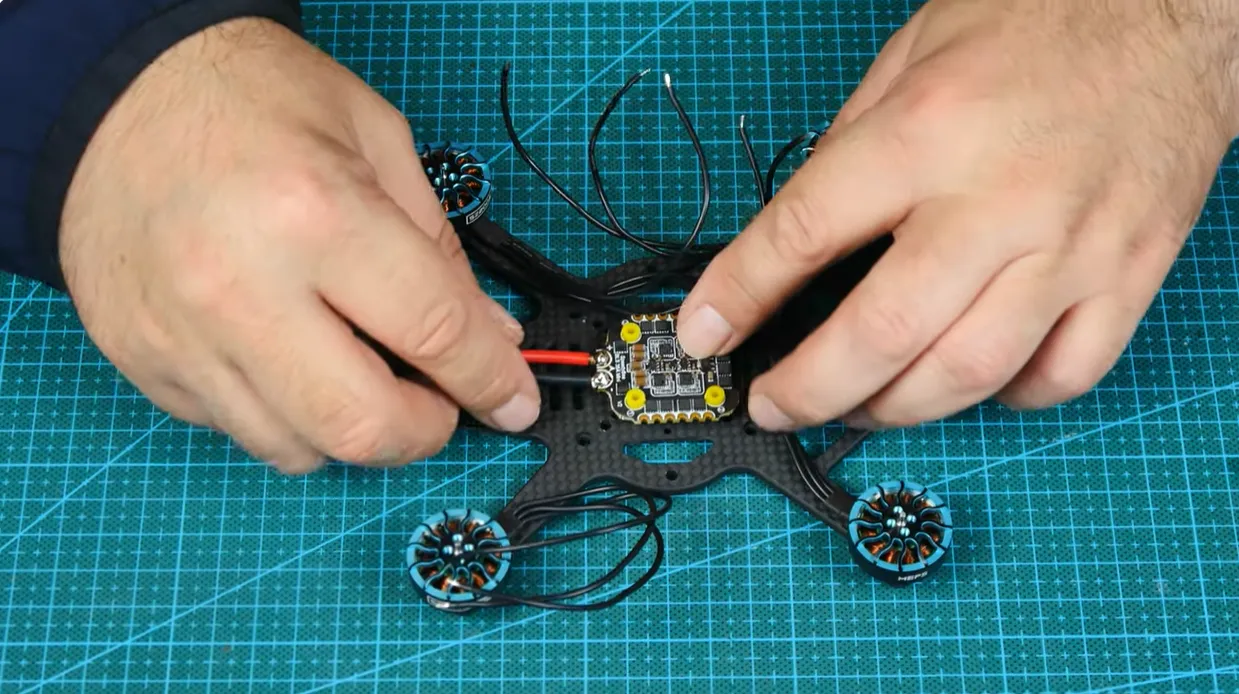
The flight controller is mounted atop the ESC. We make sure to connect them properly, paying close attention to the alignment of pins and sockets. This step is crucial for the communication between the ESC and the flight controller.
- Solder the XT60 connector and capacitor to the ESC.
- Mount the 20×20 stack on soft standoffs.
- Connect the F405 flight controller to the ESC.
- Double-check the board orientation (arrow forward).
Adding the Receiver
- Wire the ELRS Nano receiver: 5V, GND, TX → RX, RX → TX.
- Secure with heat shrink to prevent movement.
Installing the FPV System
- Mount the RunCam Link Phoenix camera in the TPU bracket.
- Attach the VTX and secure the antenna properly.
- Wire power, ground, TX, and RX to the FC.
For this build, we opt out of adding GPS, considering the CineWhoop’s intended use for close-range flying.
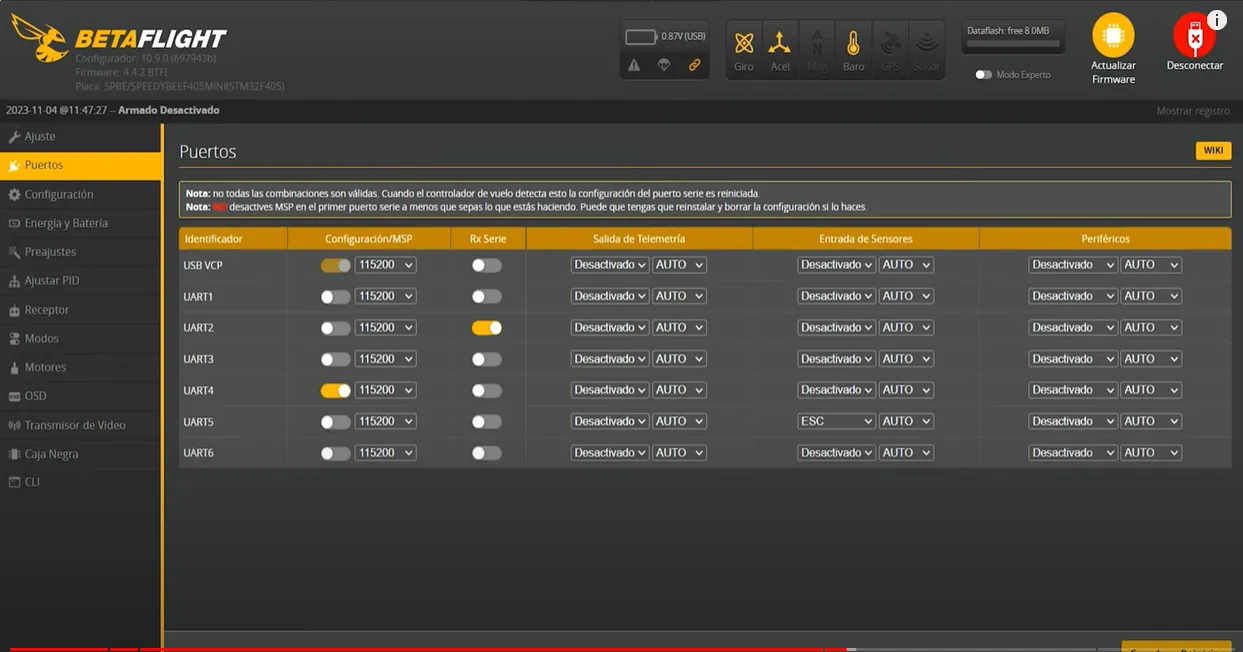
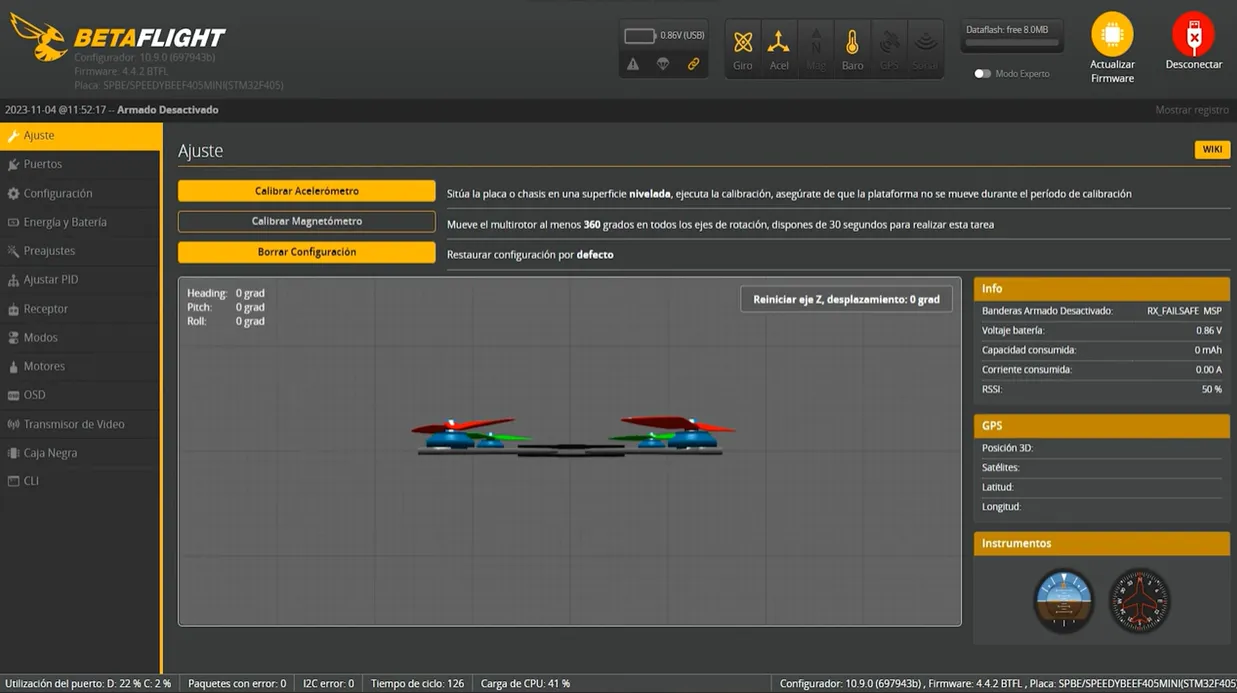
Connecting and Configuring in Betaflight
Preparing for Configuration
Once we have the drone connected to the USB, it’s essential to make the necessary adjustments in Betaflight.
- Connect the quad via USB to Betaflight Configurator.
- Flash the latest firmware for the F405 Mini board.
- Assign the correct UARTs for receiver and VTX.
- Configure OSD for voltage, mAh, RSSI, and flight time.
For clarity in setup, we will place the drone on the ground and prepare to connect the cables. In my case, I’ve already borrowed the necessary cables, but I will explain the process as if I were lending them to you.
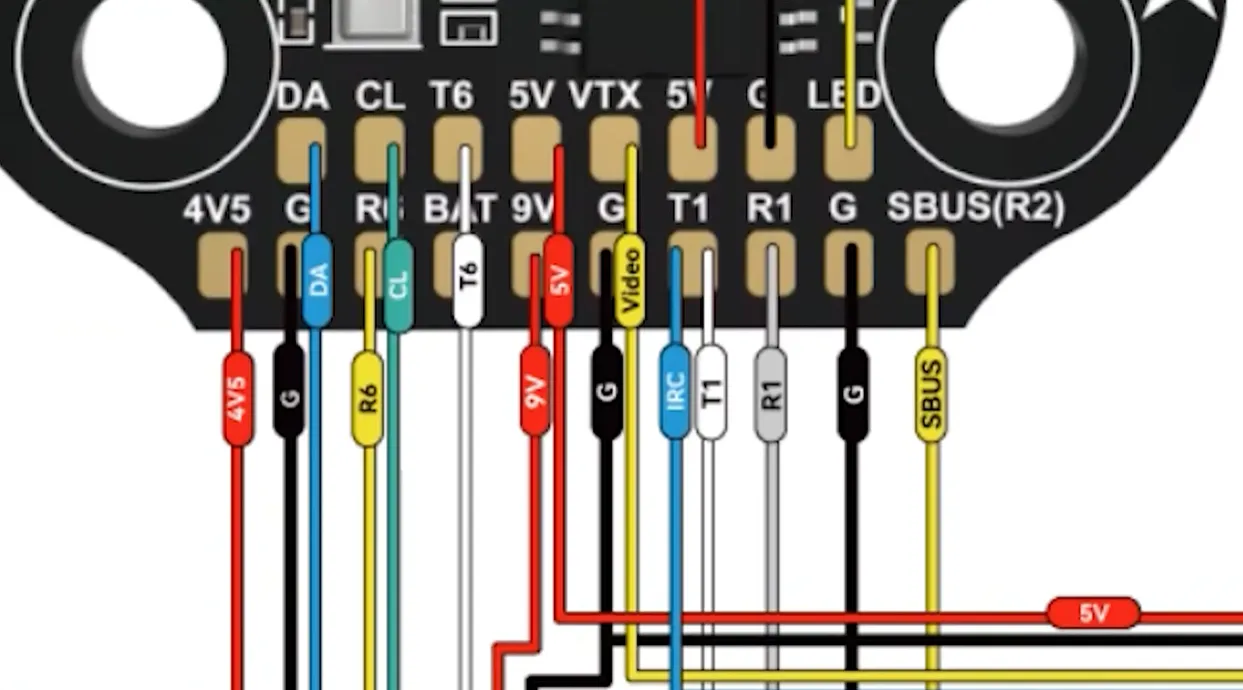
Wiring Details
The white cable corresponds to the ‘T’ (transmit) pin and will, therefore, be connected to the ‘R’ (receive) pin on the drone.
The yellow cable, corresponding to ‘R’, will be connected to ‘T’. The ‘T’ pin, in my setup, is located towards the corner.
Next in the sequence is the ‘R2’ pin, to which the white cable (T) connects, followed by the positive and ground cables.
Installing the Video System
After the wiring, the next step is to install the video system. Assuming there are no further adjustments, we proceed to save the settings for the motors and move on to the OSD (On-Screen Display) configuration.

OSD Configuration
In the OSD section, adjustments are made based on whether you’re working with HD mode for O3 systems or normal mode for V2. Since I’m working with V2 in non-HD mode, I’ll only configure essential elements like voltage, milliamperes consumed, drone identifier, RSSI (Received Signal Strength Indicator), and the 2s timer, which indicates how long the drone has been armed. These settings are straightforward and require no further modifications.
Testing and Adjusting Motors
Motor Test
The next crucial step is testing the motors. This process involves checking the order of the motors and ensuring they spin correctly. If not, we must reorder them accordingly. After verifying the motor order and direction, we save the settings.
- Test motor order and direction in Betaflight.
- Reverse motors in BLHeliSuite if needed.
- Use “props out” configuration for better flight handling.

Final Adjustments
With the motors configured correctly, the final step involves adjusting their direction to ensure that the propellers spin outward, enhancing the drone’s performance. After saving these adjustments and a final check, the drone’s engines are ready.
Conclusion: The Drone is Ready to Fly
The completion of these steps signifies that the drone is ready for flight. Earlier in the video, I showcased its flight capabilities, highlighting its performance. For those seeking more power, upgrading to larger motors is an option. However, the current setup offers a good balance of power and flight time. An important note is the potential propeller upgrade, which I recommend for optimal performance.
If you’re an experienced pilot who enjoys testing new components like the MEPS 2004 motor, you may be a great fit for the MEPSKING Vine Voice program. It’s an official reviewer initiative where skilled FPV pilots get early access to products, share feedback, and help shape future releases.
Learn more and apply to join the community of professional FPV testers.
