
Introduction:
This guide outlines the process of updating firmware on FPV drones, covering both flight controller and ESC. It emphasizes the importance of firmware updates for optimal performance and compatibility with the latest features. The steps include preparation, updating flight controller firmware using Betaflight, configuring settings, and flashing both 8-bit and 32-bit ESC firmware. By following these steps, users can ensure their drones are equipped with the latest firmware for enhanced performance and functionality.
- Preparation: Assemble drone and download necessary firmware update software for flight controller and ESC.
- Flight Controller Update: Connect flight controller to computer, enter firmware burning mode, select appropriate firmware version in Betaflight, flash firmware, configure settings, and reboot.
- 8-bit ESC Update: Power up drone, connect to web interface, read setup, select firmware, flash firmware, and reboot.
- 32-bit ESC Update: Similar process as 8-bit, but using different software and firmware selection.
- Conclusion: Updating firmware is crucial for optimal drone performance; follow the steps to ensure compatibility and enhanced functionality.
What you need:
Freestyle Recommended:


Racing Recommended:


Video Overview
Before diving into tuning your FPV drone, it’s essential to update the firmware for both the flight controller and ESC. This ensures optimal performance and compatibility with the latest features. Follow this guide for a smooth firmware update process.
Firmware Update Preparation
As an FPV pilot, I always do the following prep before touching firmware:
- Fully charge your LiPo battery.
- Use a data-capable USB cable (not just a charging cable).
- Place a small cooling fan to avoid VTX overheating.
- Download and install Betaflight Configurator (v10.10+ for Betaflight 4.5+) from GitHub.
- Identify your ESC type: 8-bit (BLHeli) or 32-bit (BLHeli_32).
Ensure your drone is assembled and ready for tuning. Download the necessary firmware update software for Betaflight and ESC, depending on your system and ESC type.

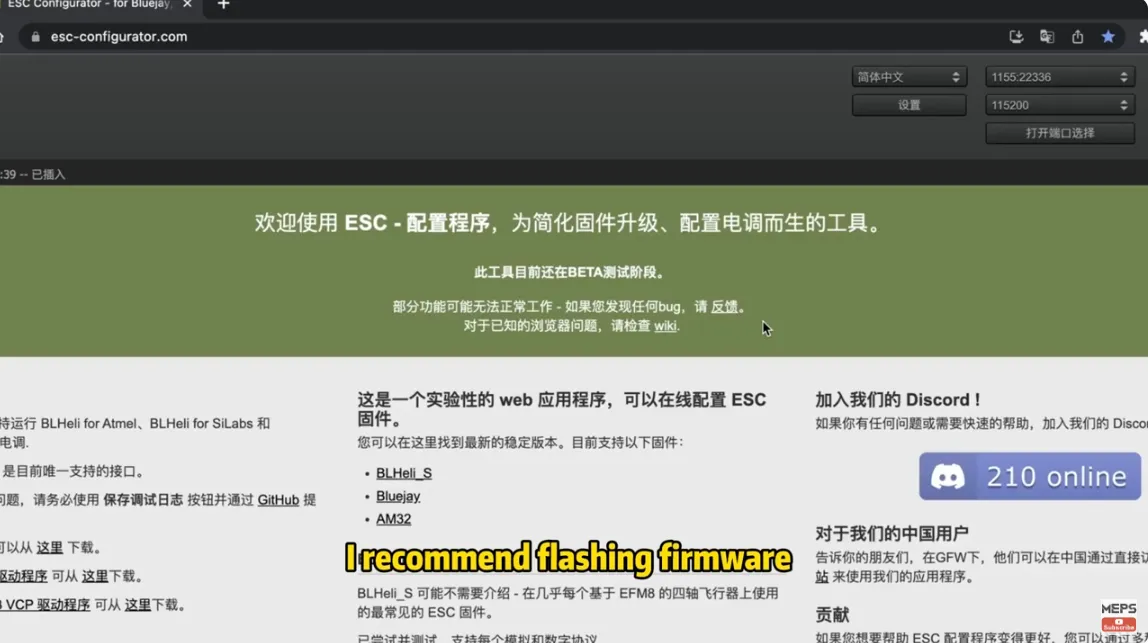
For your ESC, there are two types: 8-bit and 32-bit. Each requires a different software. If you have a 32-bit ESC, you can download it here. If you’re using an 8-bit ESC, I recommend flashing firmware that supports bidirectional ESC protocol. You can do this through a web page.

Backing Up Your FC Settings
Before updating firmware, always back up your settings. Flashing wipes your configuration.
Steps:
- Connect your FC to Betaflight Configurator.
- Go to CLI tab, type:
diff all - Copy all output and save it as a text file.
- Also take screenshots of Ports, Receiver, PID tabs for reference.
💡 Why this matters: This makes restoring your tune and setup quick and safe after flashing.
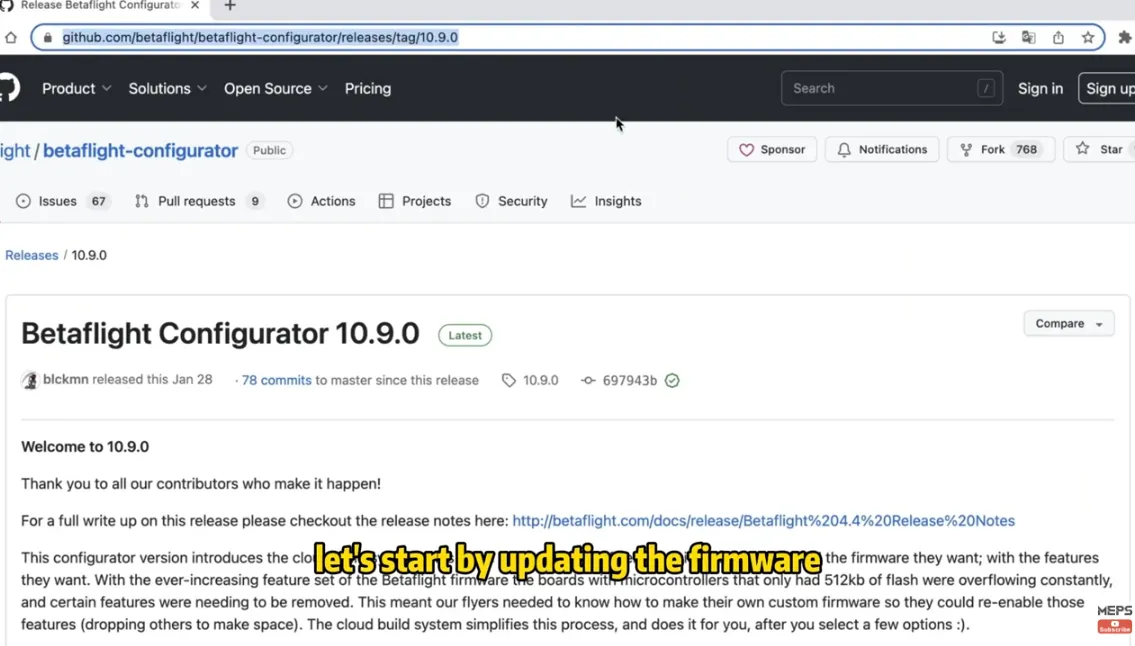
How to Update Betaflight Firmware on Flight Controller
Connect FC to Your PC
Plug the USB data cable into your flight controller (FC). Do not connect the LiPo yet.
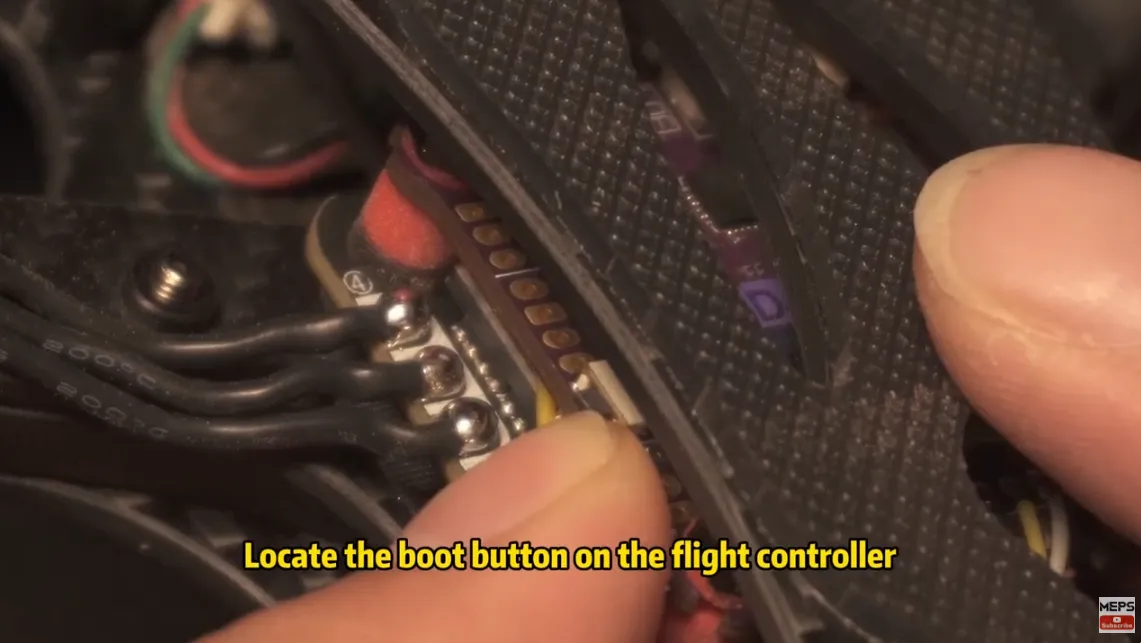
Enter DFU Boot Mode
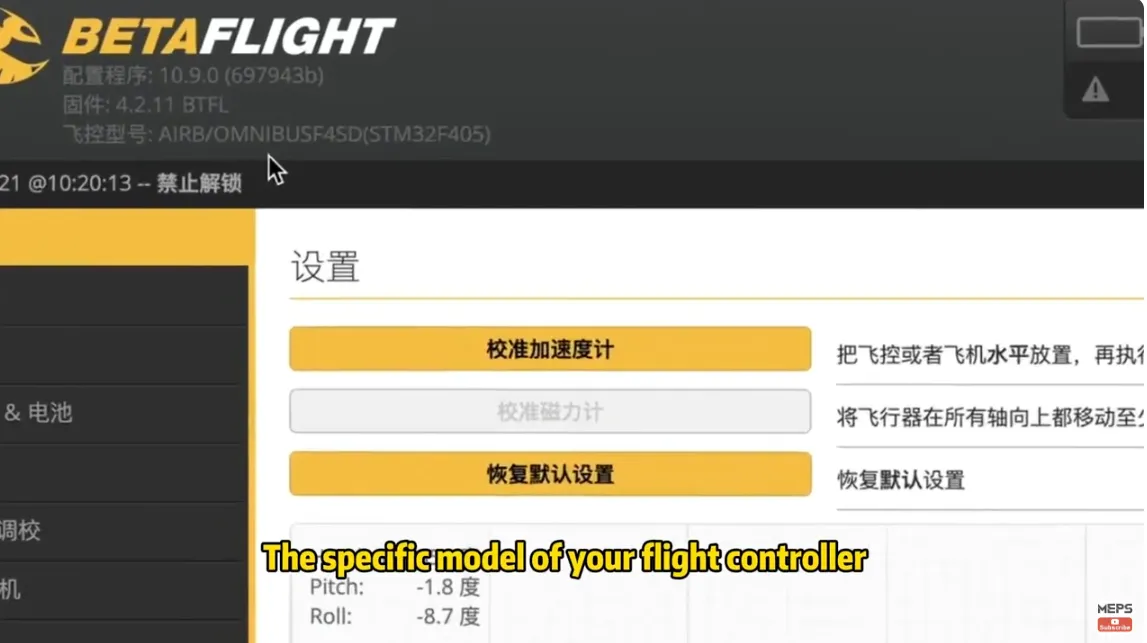
- Note your FC target name in the Betaflight Configurator (e.g.,
BETAF4,STM32F411). - Unplug, press and hold the boot button on the FC, then plug the USB back in.
- You should see
DFUappear in the top-right corner of Betaflight Configurator.
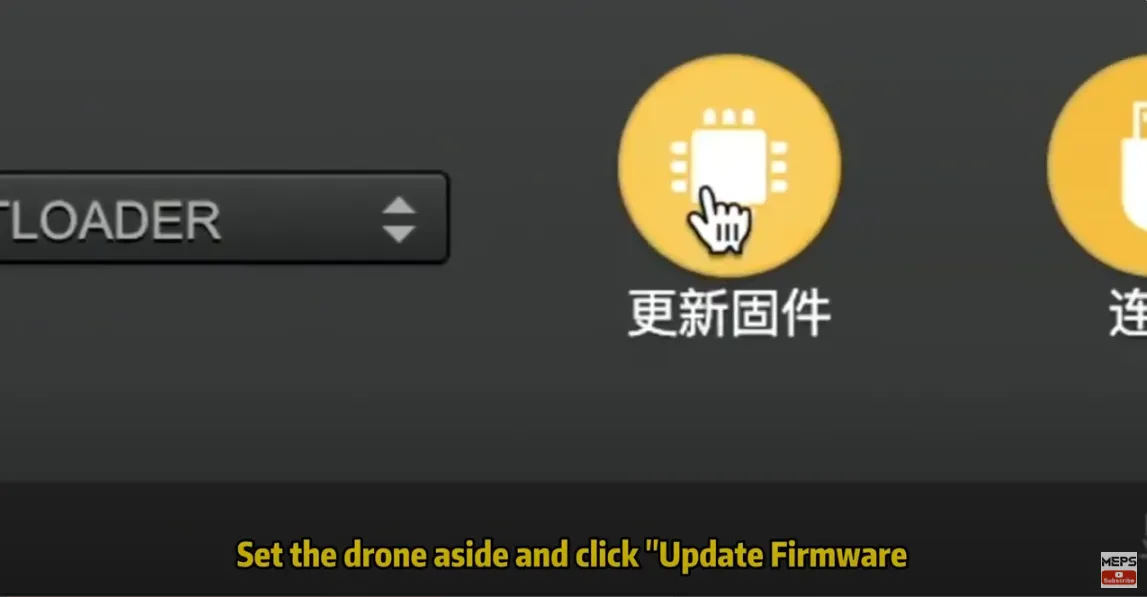
Set the drone aside and click “Update Firmware.”

Flash the Firmware
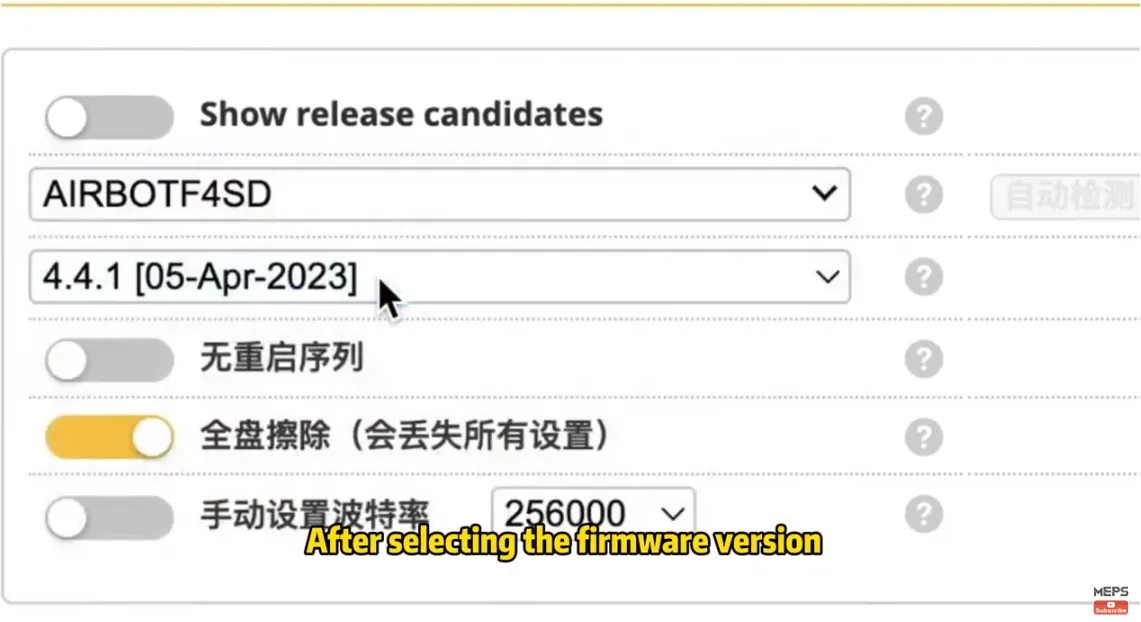
Select the appropriate firmware version and flash it.
- Go to the Firmware Flasher tab.
- Choose your board target and the latest stable firmware version.
- Enable “Full chip erase”.
- Click Load Firmware Online, then Flash Firmware.
During this process, be careful not to touch the drone or connected wire to avoid any potential burning failures.

Wait for Flashing to Complete
Don’t move the drone or touch the cable during flashing to avoid errors.
Configuring the Flight Controller After Update
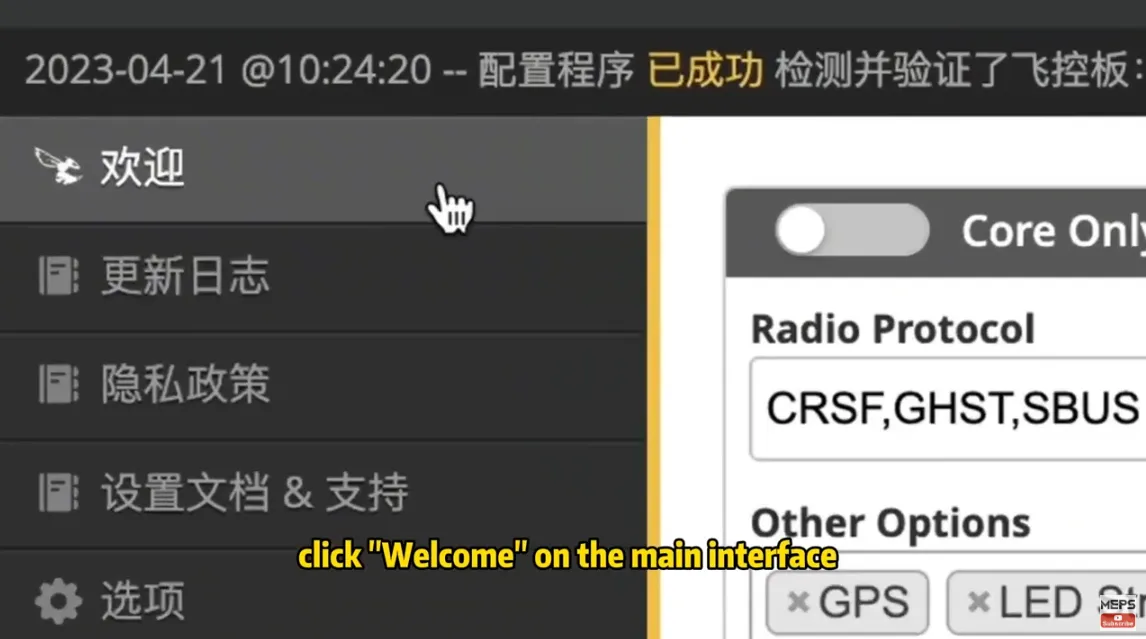
Once the firmware finishes flashing:
- Click “Welcome” to reconnect.
- Click “Apply Custom Defaults” (or “Apply Defaults”).
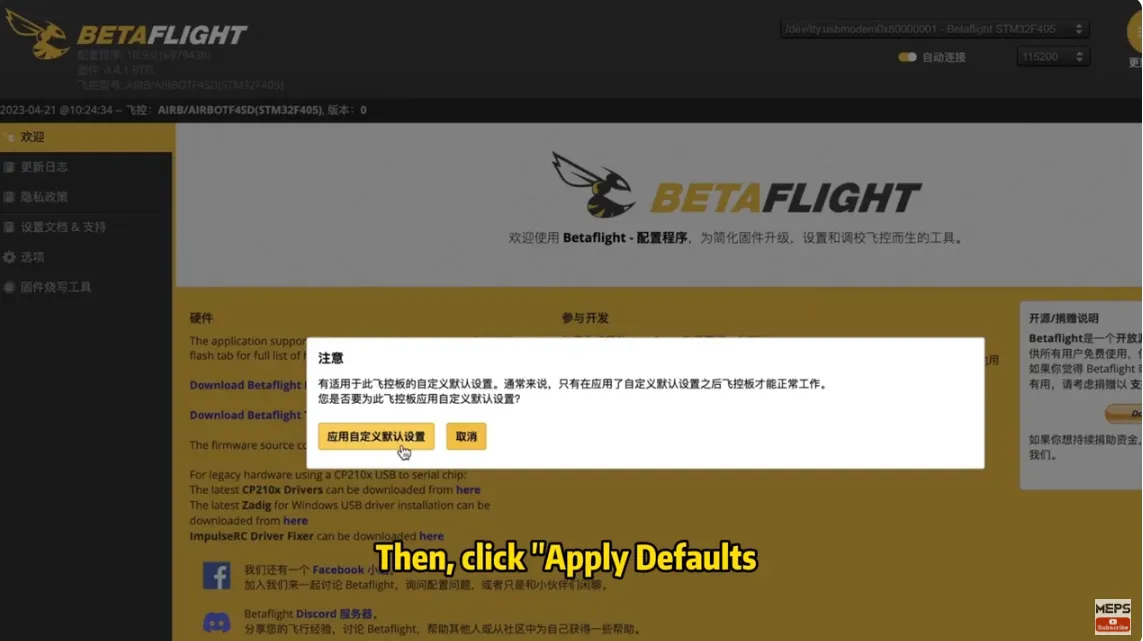
- If you see a warning message, simply close it.
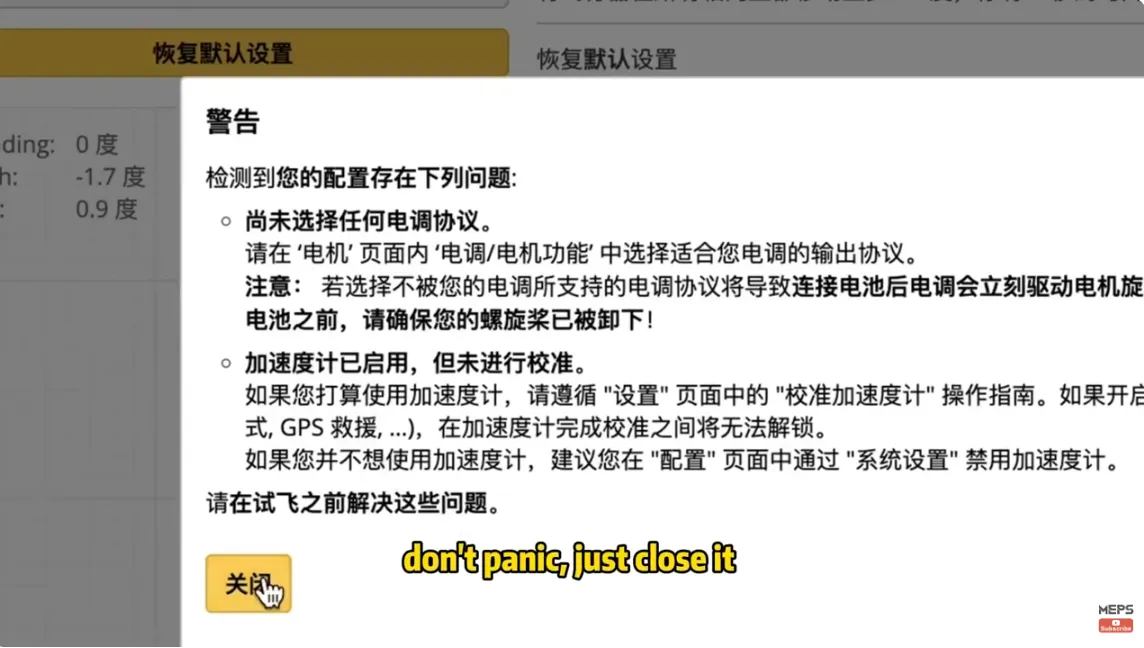
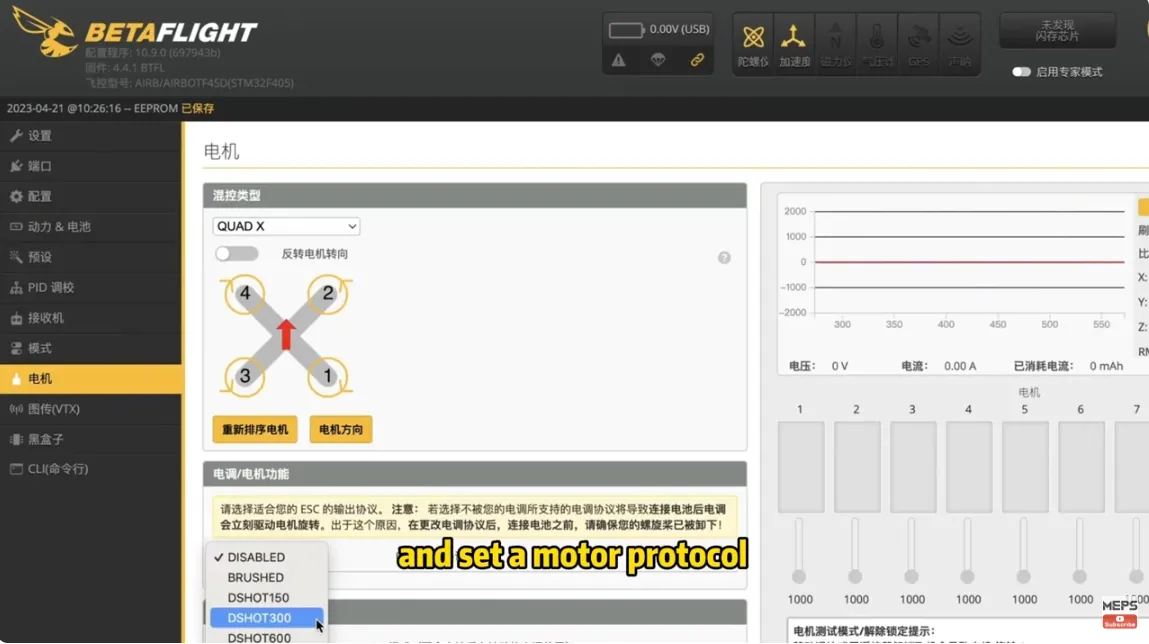
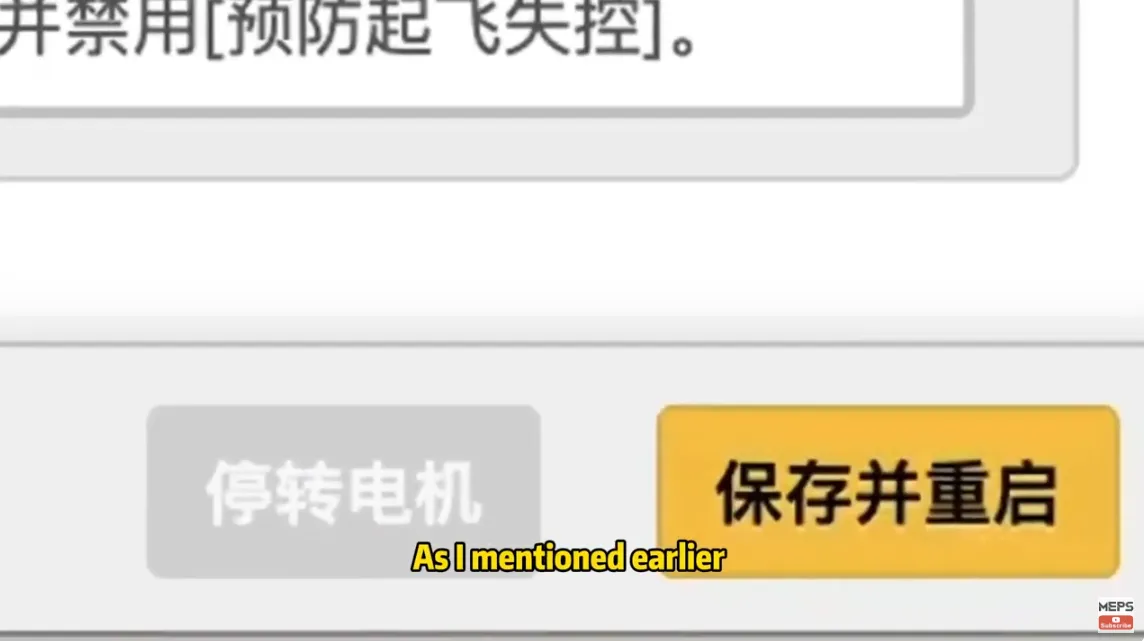
- Go to the Configuration tab, set your motor protocol (DSHOT300 or DSHOT600), then click Save and Reboot.
Pro Tip: Always back up your Betaflight configuration before updating, so you can easily restore your PID tunes and rates.
Flashing 8-bit ESC
Let’s start by flashing the 8-bit ESC. In the web interface, power up the drone. To prevent the VTX from overheating, it’s a good idea to use a small fan for some airflow.
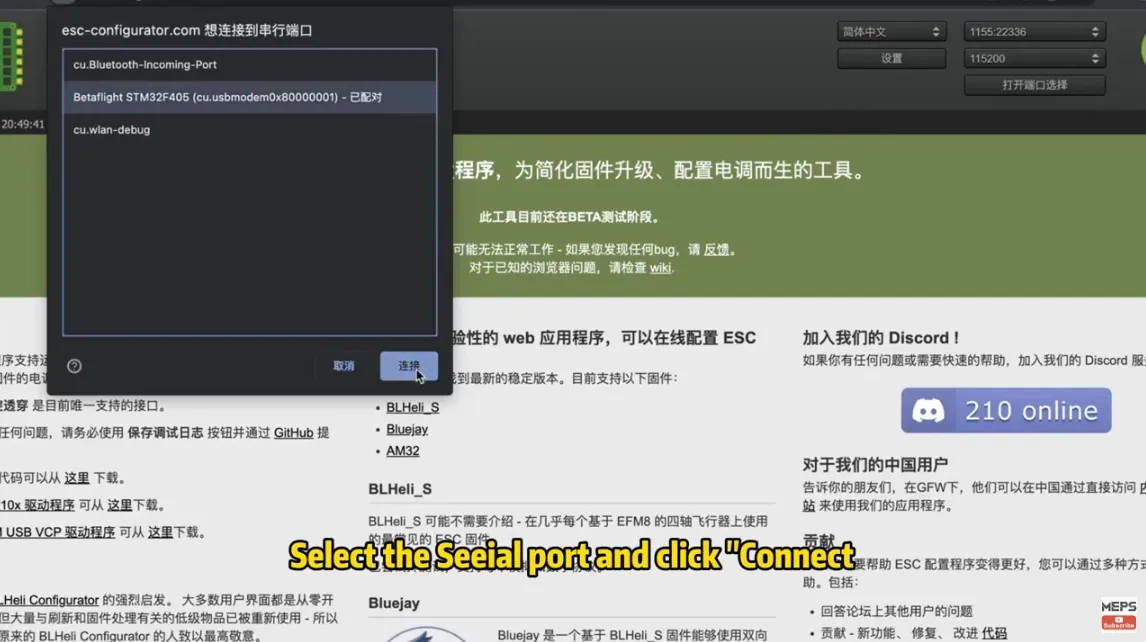
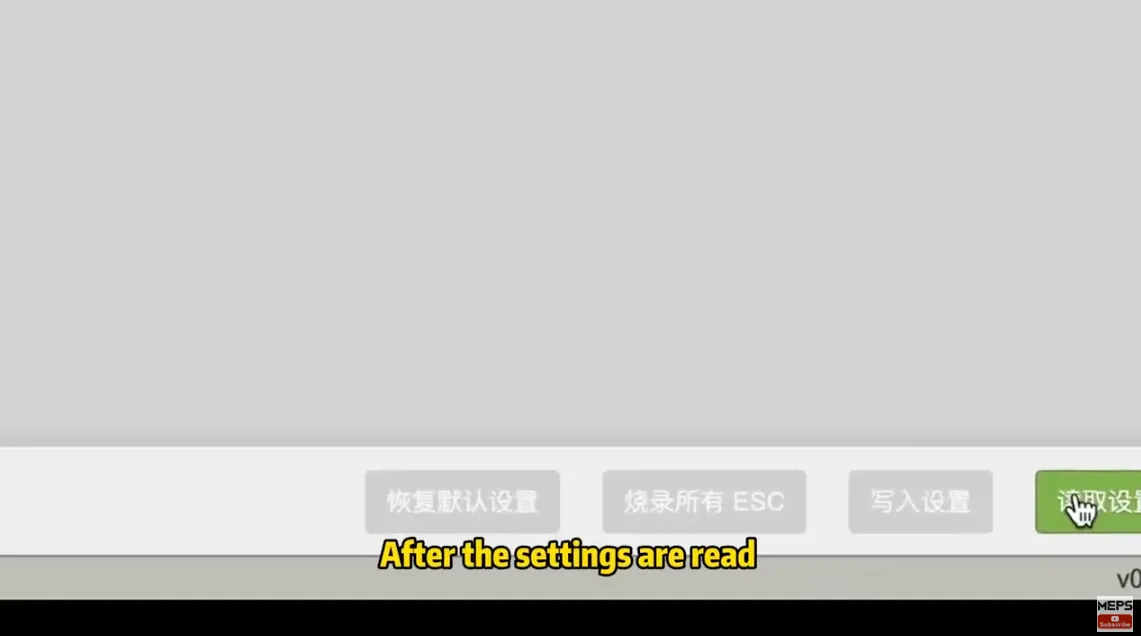
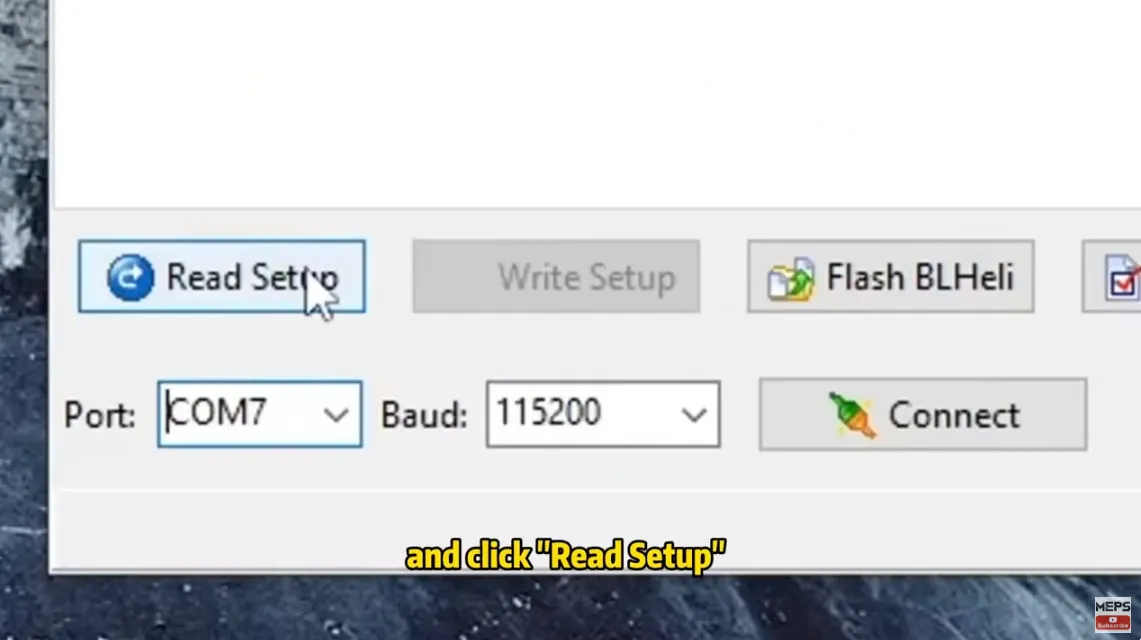
Select the Seeial port and click “Connect.” Then, click “Read Setup” in the bottom right corner. After the settings are read, click “Flash Firmware” in the bottom right corner.
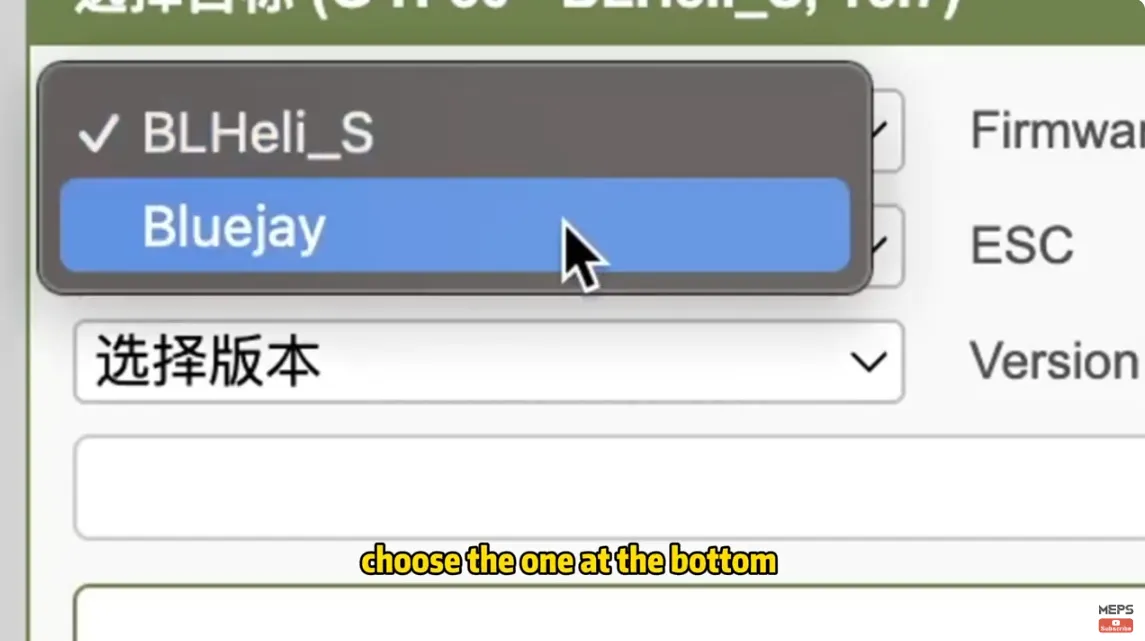
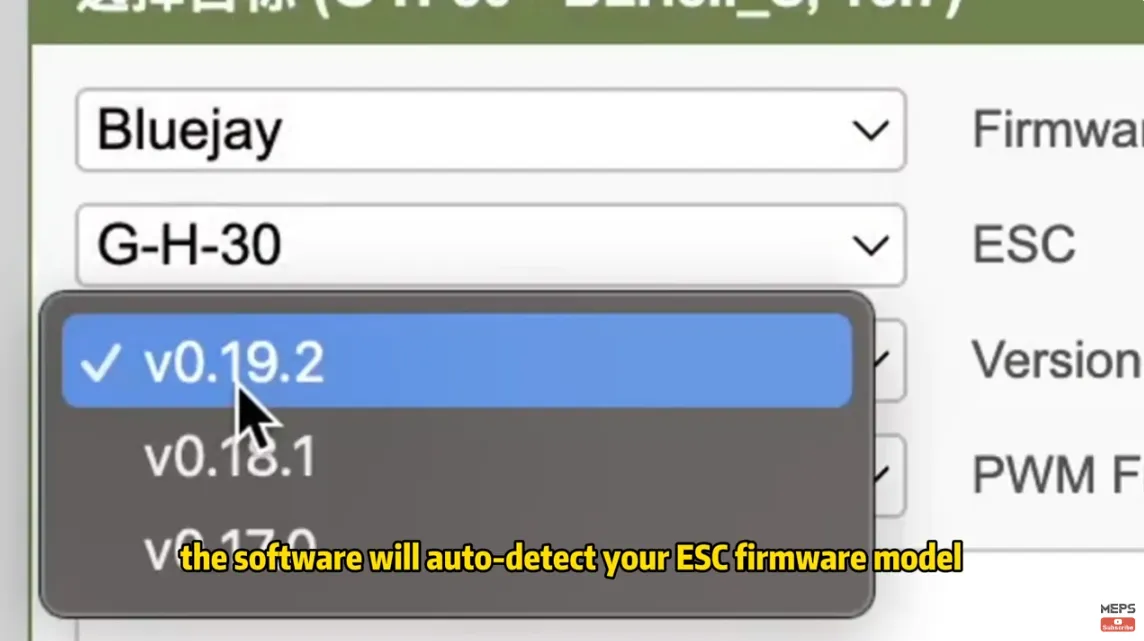
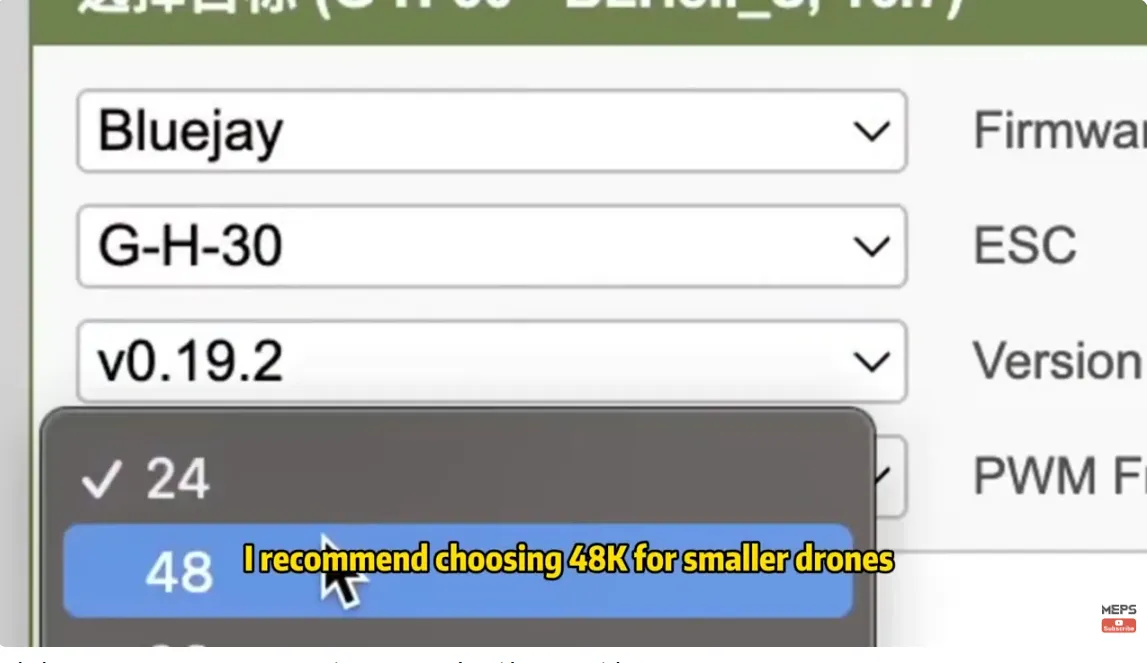
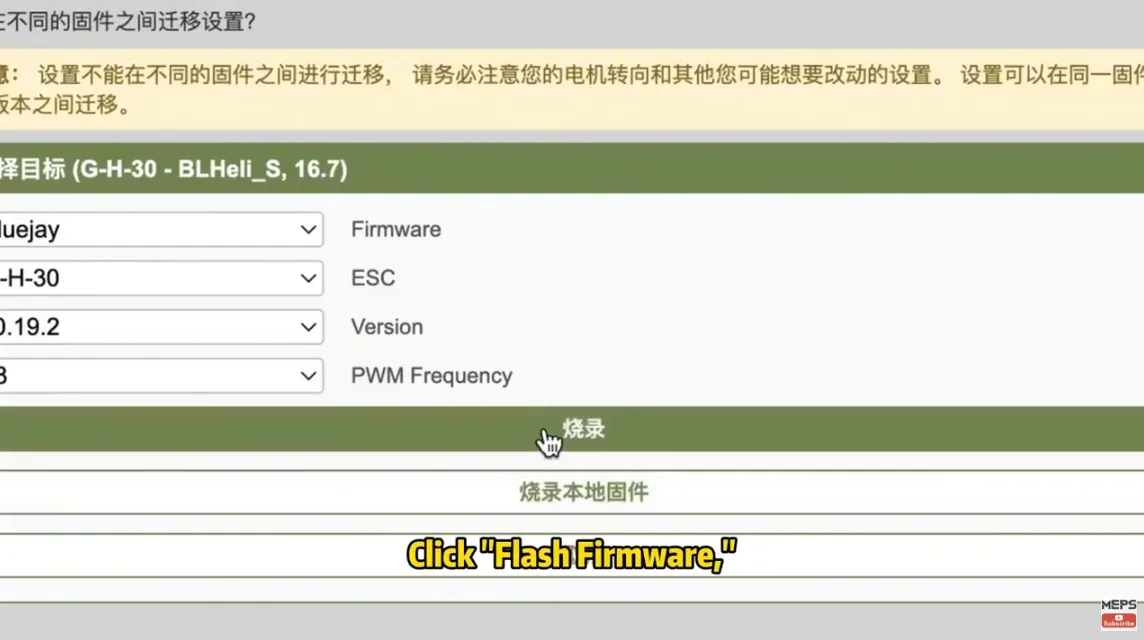
For the first option, choose the one at the bottom. For the second option, the software will auto-detect your ESC firmware model. For the third option, select the latest firmware I recommend choosing 48K for smaller drones as it’s more power-efficient. Click “Flash Firmware,” and wait for the flashing to finish. Then, disconnect. The drone will reboot automatically.
Flashing 32-bit ESC
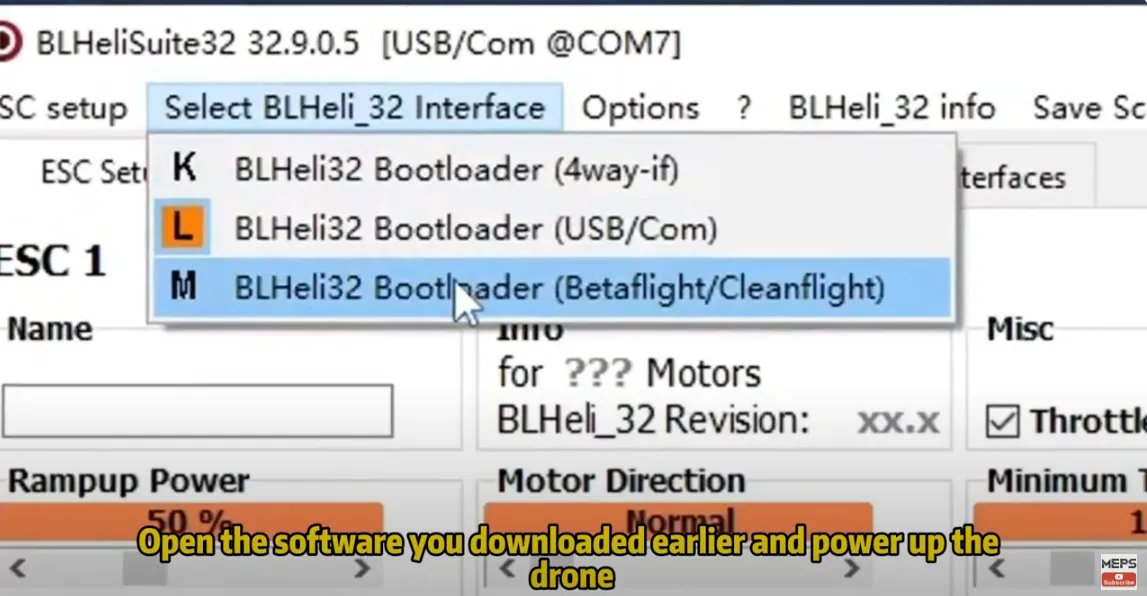
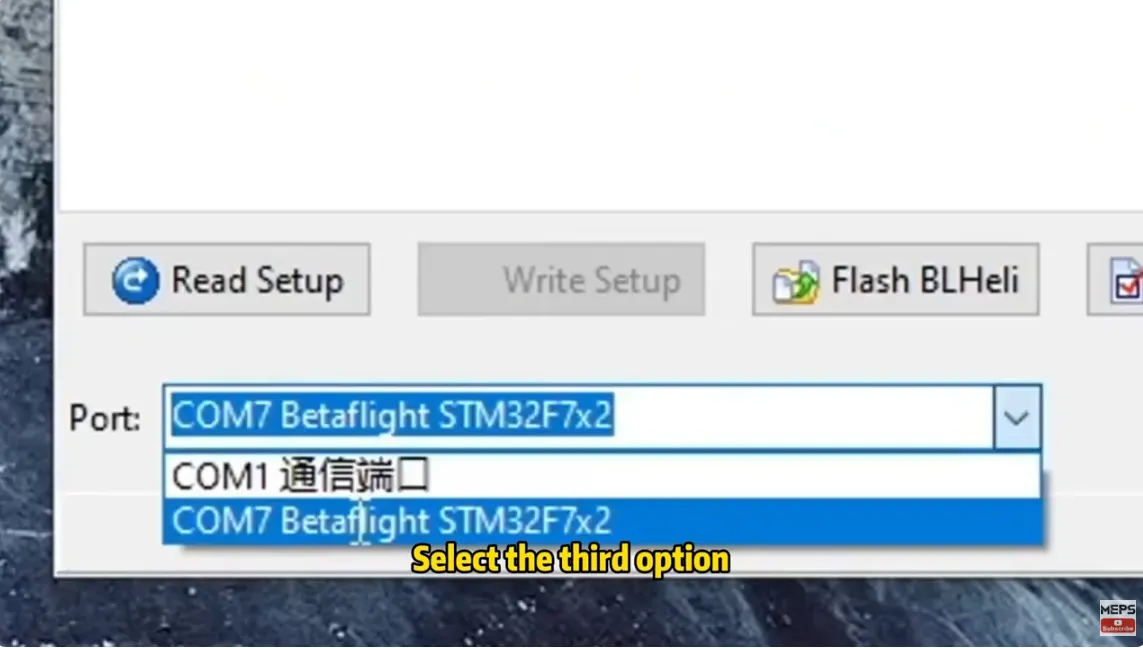
Now, let’s talk about how to upgrade a 32-bit ESC. The process is similar to what we just did. Open the software you downloaded earlier and power up the drone. Select the third option, choose the port and click “Read Setup”.
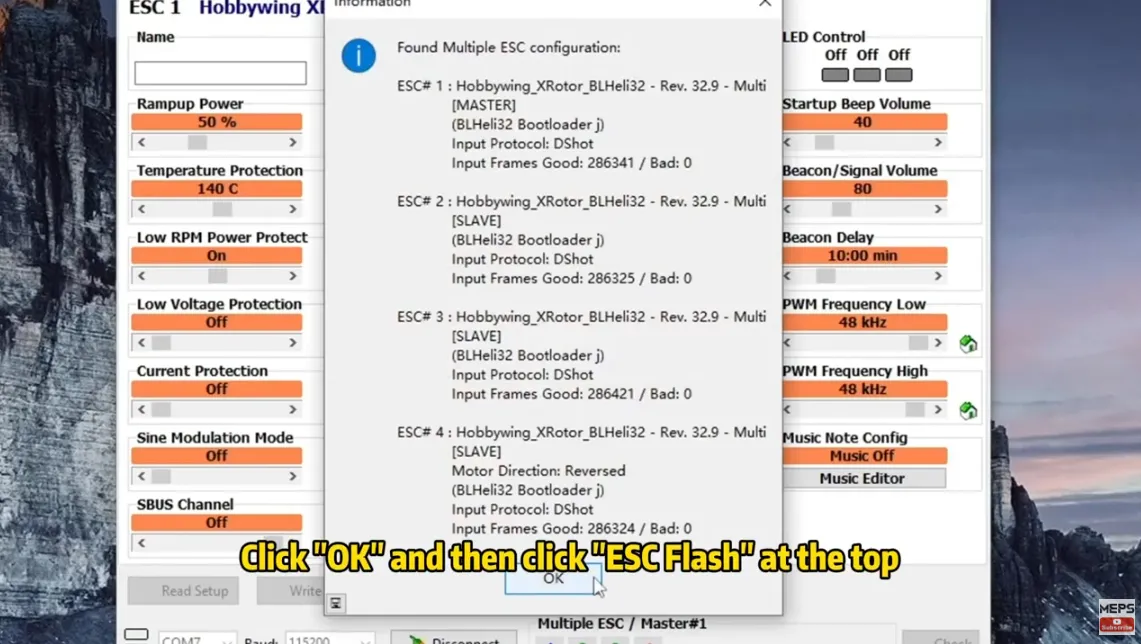
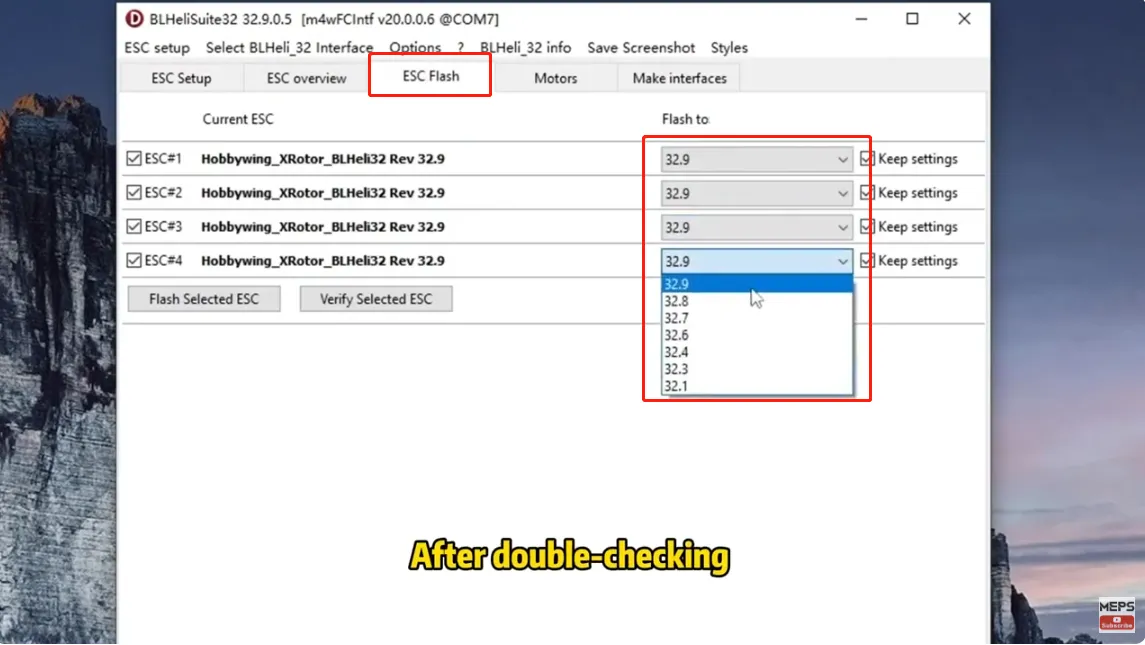
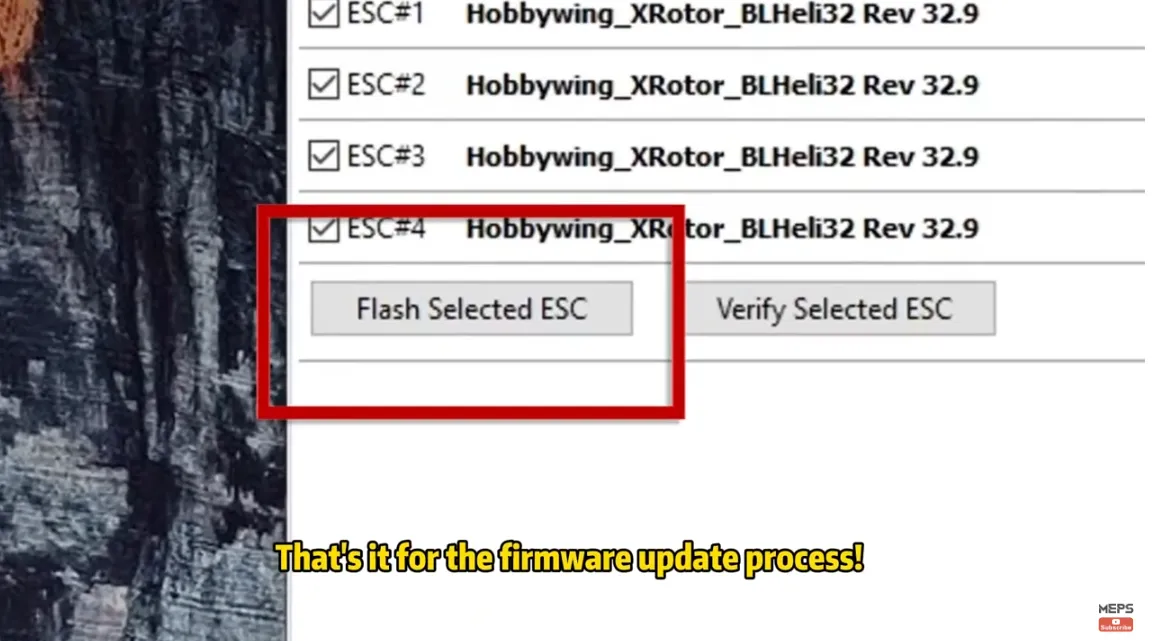
The software has detected the ESC firmware. Click “OK” and then click “ESC Flash” at the top. Since I’ve already flashed it, it’s showing the latest version. After double-checking, click “Flash Selected ESC” here.
Completing Firmware Updates
- Once both FC and ESC updates are done, disconnect the drone.
- Reboot everything and do a quick check in the Betaflight Motors tab to confirm all motors spin correctly.
- Restore your previous settings (if you saved a backup) and recalibrate your accelerometer if needed.
Conclusion
Updating your FPV firmware is essential for performance, safety, and accessing the newest Betaflight features. By following this guide, you can safely update Betaflight firmware on both your flight controller and ESCs, ensuring your FPV drone is always ready to deliver its best flight performance.