
Keeping your FPV drone motors clean is one of the easiest ways to protect performance and extend motor life. Dust, sand, grass, mud, and even salt can build up inside your motors after only a few flights—especially if you fly freestyle or race in rough environments. A clean motor spins smoother, runs cooler, and maintains maximum thrust.
Below is a practical, pilot-tested guide on exactly how to clean FPV drone motors safely and effectively, even after hard crashes, muddy racing sessions, or saltwater exposure.
👉 Explore the collection of FPV Motor on MEPSKING.
Why is it Essential to Clean Drone Motors?
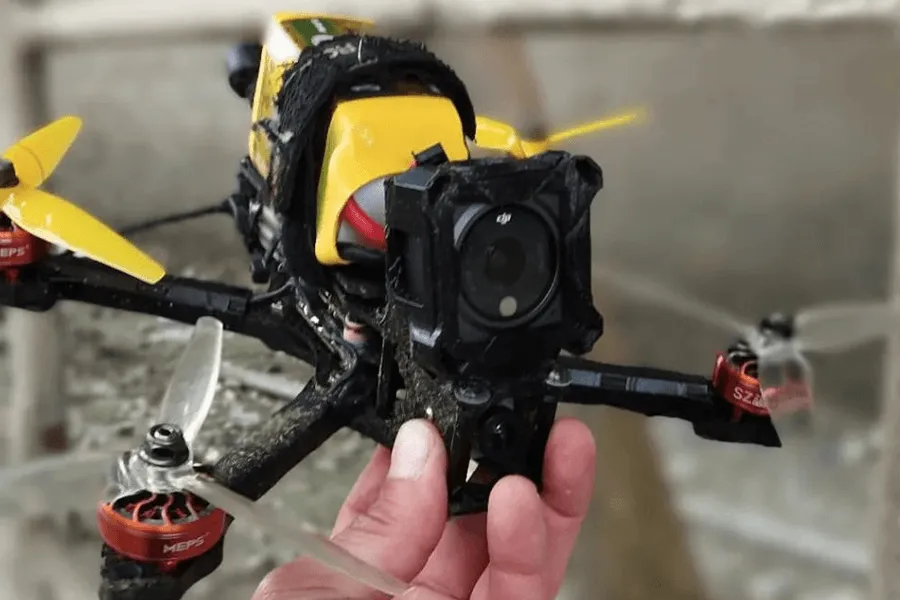
It’s likely that you have seen that FPV drone motors are not well protected. The bldc motor windings are clearly visible from both below and above the FPV motor.
What May Happen If Not Clean FPV Drone Motors in Time?
Here are some incidents that may occur if you do not clean your FPV drone motors in time.
- Overheating: The FPV motor dissipates heat through clean airflow across it; therefore, if the magnetic surfaces of the rotor are heavily contaminated, the heat may not dissipate effectively. Your motors run hotter than they should as a result of this.
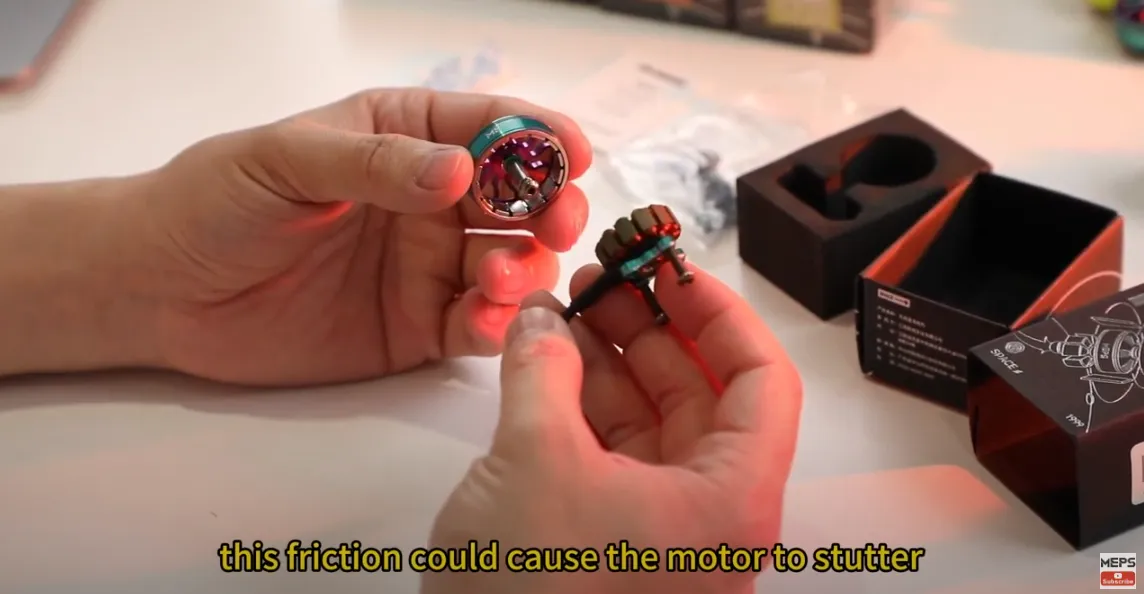
- Wear and excessive friction: The crushed ceramic particles between the rotor and stator cause wear and increased friction in addition to harming the polished surface. Over time, this could cause irreparable damage to the drone motors.
- ESC overloading: The motor movement is slowed by the accumulation between the rotor and stator. The power drain will rise as a result of the ESC sending the motor additional current in order to make up for it. You run the risk of burning your ESC or motor coils if things get worse. Preventive software on certain expensive drones can identify clogged motors in the event of an overload.
- Damage to the bearing: A motor’s bearing is a crucial part that is frequently prone to mechanical failure. Because brushless motor bearings are partially sealed, there’s a chance that tiny dirt particles could enter the bearing and contaminate the lubricant. Over time, this will lead to bearing failure.
- High noise: The sound of a clogged motor is similar to scuffing two metallic or ceramic surfaces together. Not enjoyable to hear.
Why Don’t We Strengthen the Motor Protection?
Here are some reasons not to strengthen the motor protection.
- Weight: We work to create motors that are lighter to improve performance in terms of responsiveness and the total weight added to the drone.
- Heat: To keep the motors cool, there must be enough ventilation.
As a result, dirt and other impurities are very likely to become lodged inside the motor, particularly while flying near sandy beaches.
How to Clean Drone Motors?
Identify the Type of Contamination
Not all dirt is equal. Different debris requires different cleaning methods.
Common Types of Contamination
| Contaminant | Risk Level | Why It’s Dangerous |
|---|---|---|
| Salt / seawater | ★★★★★ | Causes corrosion inside bearings and magnets |
| Sand | ★★★★☆ | Damages bearings, causes scraping noise |
| Mud | ★★★☆☆ | Slows rotation, affects balance |
| Grass / dust | ★★☆☆☆ | Mild, but can attract moisture |
| Metal shavings | ★★★★★ | Magnetized particles can destroy the stator |
This is why FPV pilots often clean motors after every flight session.
Tools You Should Use
Recommended tools for safe cleaning:
- Compressed air
- Soft brush
- 90–99% IPA (isopropyl alcohol)
- Bearing oil / light machine oil
- Tweezers
- Micro screwdriver set
- Paper towel or microfiber cloth
Avoid: WD-40, silicone sprays, tap water (unless neutralizing salt), high-pressure water.
The Steps to Clean Drone Motors
Safety First: What to Do Before Cleaning
Before touching the motors:
- Remove the battery—never clean a powered drone
- Take off the props
- Avoid water pressure, detergents, or household oils
- Use only FPV-safe cleaners like IPA, compressed air, and proper bearing oil
- Work in a clean, dry area
A few minutes of setup prevent accidental injury or motor damage.
Remove the Propeller
As you cannot remove the stator assembly while the propeller is still in place, you must first remove the propeller before proceeding. To correctly remove the propeller from your FPV drone, adhere to the manufacturer’s instructions.
Remove the FPV Motor from the Frame
Take out the motor screws with a hex driver that fits well. While it is still possible to clean your FPV motor without taking it out of the drone, doing so makes things a little simpler. In certain drones, the bldc motors are incorporated more intimately into the arm, necessitating their removal. See your drone manual for an assembly/disassembly guide if you’re unsure how to take the drone motor out of the arm. We’re going to replace the FPV motor exactly as it was, so be careful not to destroy any fragile plastic housing.
Disassemble the FPV Motor
It’s time to open it up after the motor has been turned off. While some bldc motors have a c-clip ring, others have a shaft screw at the bottom. A screwdriver can be used to unscrew the screw, and tweezers are needed to push the open ends of the C-clip together so that the ring can be removed.
Separate the Rotor and Stator
After removing the screw or C-clip, you can open the FPV motor and take out the two main components. Keep in mind that the motor’s permanent magnets are extremely strong, so you’ll need to use a lot of energy to pry the two sections apart.
Should the Bell Become Lodged in the Bearing?
The bell is held in place by two bearings in the stator. And it may occasionally become lodged inside the bearings due to the positioning tolerance of these bearings being a bit off. Here, my recommendation would be to tap the bell’s edges with a soft mallet to see if the vibrations will cause it to come loose. If that doesn’t work, you can try tightening the propeller nut back onto the shaft and pulling the bell much more forcefully with a pair of pliers against the nut.

Thoroughly Clean the FPV Motor Windings and Bearing
Apply rubbing alcohol and a toothbrush to the FPV motor windings and bearing, and clean them thoroughly. There are several alcohol-based products available that work well for motor cleaning. Names change based on your geographic location. Any of the ensuing options is appropriate:
- Rubbing alcohol (Surgical Spirit, another name for it)
- Alcohol that has been denatured (sometimes called methylated spirit)
- Isopropyl / IPA
I would suggest rinsing the dirt and pollutants off with a toothbrush soaked in alcohol. Use a generous amount of alcohol; any extra will soon evaporate. To absorb any excess, use the lint-free cloth.
Thoroughly Clean the FPV Motor Bell
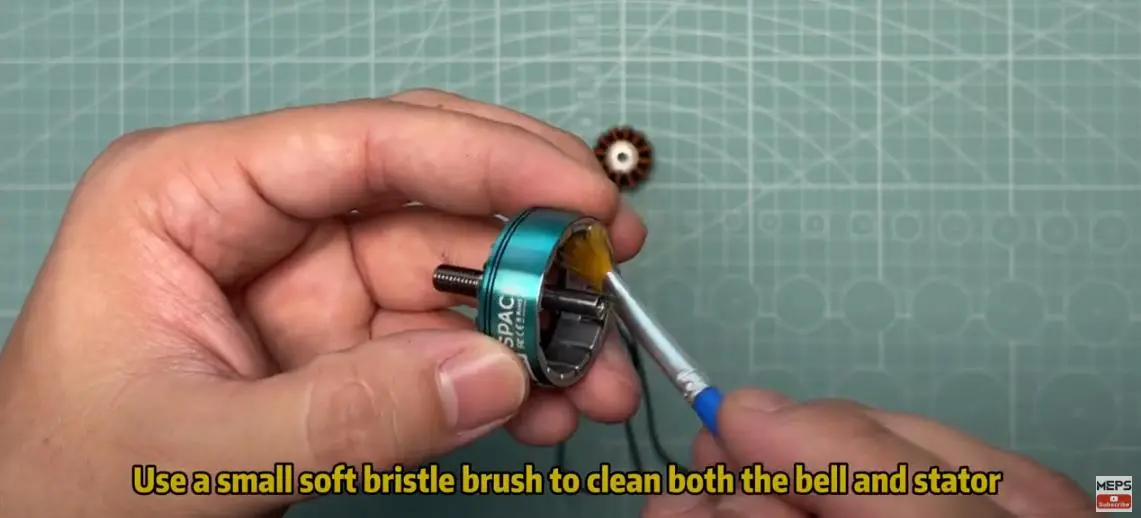
Thoroughly clean the motor bell using rubbing alcohol and a toothbrush. Make sure that all impurities are gone from the magnets by doing the cleaning process again on the motor bell portion. Pay close attention to any areas where dirt could become stuck, such as the spaces between the magnets. It is critical that the space between the magnets and the stator be free of impurities.
Deep Cleaning (for mud, sand, or after crashes)
If you feel grinding, hear noise, or see dirt inside the bell, use deeper cleaning.
Steps
- Remove props
- Unscrew the bell (some motors use C-clips, others use M2 screws)
- Carefully pull off the motor bell
- Use IPA (isopropyl alcohol 90%+) to clean the stator and bell
- Remove sand or mud using a brush + tweezers
- Lightly oil the bearings (1 small drop ONLY)
- Reassemble the motor
- Check smooth rotation by hand
⚠️ Warning:
Avoid over-oiling—excess oil attracts dust and shortens bearing life.
Saltwater Exposure Cleaning(VERY IMPORTANT)
Saltwater is the worst-case scenario for FPV motors. If your drone touches seawater or salt mist:
Do this IMMEDIATELY
- Rinse motors with fresh water (yes, fresh water removes salt)
- Then soak in isopropyl alcohol for 3–5 minutes
- Blow dry with compressed air
- Disassemble the motor and clean inside thoroughly
- Oil the bearings
- Replace bearings if smoothness does not return
Salt corrosion is permanent—early cleaning can save the motor.
Reassemble the FPV motor
Reinstall the motor’s parts and reattach it to the frame. It’s time to put the FPV motor back together after the parts have been cleaned and allowed to dry! Just go back and repeat the steps to reassemble the FPV motor.
Motor Feels Rough? Here’s What to Check
- Rough grinding: sand in bearings
- High-pitch whine or vibration: dirt inside the bell
- Motor hot after flight: bearing friction + dirt buildup
- Motor doesn’t spin freely: bent shaft or severe bearing damage
If your motor still feels rough after cleaning, you likely need new bearings or a replacement motor.
Tips for cleaning FPV drone motors
- The rotor/stator assembly and bearing area don’t need oil. You don’t need to oil the bearing because it’s sealed and has lubricating grease inside. Oil can make motors dusty and damage them.
- There is also no need for oiling because the rotor magnets and stator in a well-balanced drone motor never come into contact with one another.
- Avoid using water to clean the FPV motor parts. The internal components may erode due to leftover water. Should you decide to wash the motor, be sure to thoroughly dry it using bursts of compressed air to eliminate any remaining water.
- Because the stator coils are fragile and can be damaged by vigorous handling, handle them carefully to protect the thin plastic insulation.
How Often Should You Clean FPV Motors?
| Flying Environment | Cleaning Frequency |
|---|---|
| Grass/park | Every 10–15 flights |
| Dirt track or race gate area | Every session |
| Beach or coastal area | Every flight |
| Rain or wet conditions | After each use |
| Heavy crashes | Clean immediately |
Clean motors = smoother throttle response, better control, and less electrical noise.
When Should You Replace Your Motors?
Sometimes cleaning isn’t enough. Replace the motor if:
- Bearings are permanently rough
- The shaft is bent
- Motor overheats quickly
- The magnet is cracked or rubbing
- Motor vibrates heavily even after cleaning
Replacing bearings is often cheaper than buying a new motor—but severely damaged motors should be replaced for safety.
Join the MEPSKING Vine Voice Program
If you enjoy maintaining, testing, and fine-tuning your FPV gear, you may be a perfect fit for the MEPSKING Vine Voice— an initiative designed for pilots who want to share real flight experience and contribute to product improvement.
As a Vine Voice member, you can:
- Receive MEPSKING motors, propellers, ESCs, and other components for testing (such as the NEON 2306 series).
- Share your flight reviews, build notes, or maintenance comparisons with the FPV community.
- Get access to exclusive discounts or priority testing opportunities for future MEPSKING products.

FAQs
Can you wash FPV drone motors with water?
Yes, you can rinse brushless FPV motors with water, but only when necessary—like removing mud after a crash. Deionized water is safest because it won’t leave mineral deposits. If you use tap water, rinse quickly and dry completely before powering your drone. Motors tolerate water, but your ESC and flight controller do not.
Are FPV drone motors waterproof?
FPV motors are technically waterproof because the copper windings are coated in enamel, so they won’t short out when wet. However, the bearings are not waterproof, and water can wash out the lubrication or leave dirt behind. Flying in the rain is possible, but not recommended if you want your motors to last longer.
How do you remove sand or dirt from a drone motor?
Blow out the sand with compressed air, flush with isopropyl alcohol, and use tape on the magnets to lift stubborn particles. Some sand is slightly magnetic, so take your time—any remaining grains may cause grinding noises or vibration.
Should you oil FPV drone motors?
Yes, but you oil the bearings, not the motor itself. Use a thin bearing oil and apply a tiny drop to each bearing. Avoid thick oils because they attract dust and grime.
Can dirty motors cause desync?
Yes. Dirt, sand, or damaged bearings increase resistance and load on the ESC, which can cause mid-throttle desync. Clean the motor and check if the bell spins smoothly.