
Choosing an FPV radio controller can be confusing when you are new to FPV. There are many options with different radio protocols, sizes, gimbals, firmware, transmission frequencies, and features.
For most new FPV pilots, the easiest starting point is a 2.4GHz ELRS radio controller with comfortable gimbals and EdgeTX. From there, choose the radio size and control layout based on how you fly.
This guide explains what to look for when choosing an FPV radio controller and helps you find the right option for your drone, flying style, and budget.
👉 Explore the collection of Radio Controllers on MEPSKING.
Quick Answer: Which FPV Radio Controller Should You Buy?
If you are buying your first FPV radio, use this simple guide:
| Pilot Type | Recommended Choice |
|---|---|
| Beginner | Compact 2.4GHz ELRS radio |
| Beginner who wants room to grow | Full-size or mid-size ELRS radio |
| 5-inch freestyle | Full-size ELRS radio |
| FPV racing | Low-latency 2.4GHz ELRS radio |
| Long-range FPV | 900MHz ELRS or Crossfire |
| Frequent travel | Compact radio such as RadioMaster Pocket |
| Advanced / multiple RC models | Feature-rich radio such as TX16S |
| Existing FrSky setup | Compatible FrSky transmitter |
For most new FPV pilots, ELRS is the simplest protocol to start with because it offers low latency, long-range capability, a wide selection of receivers, and a large FPV ecosystem.
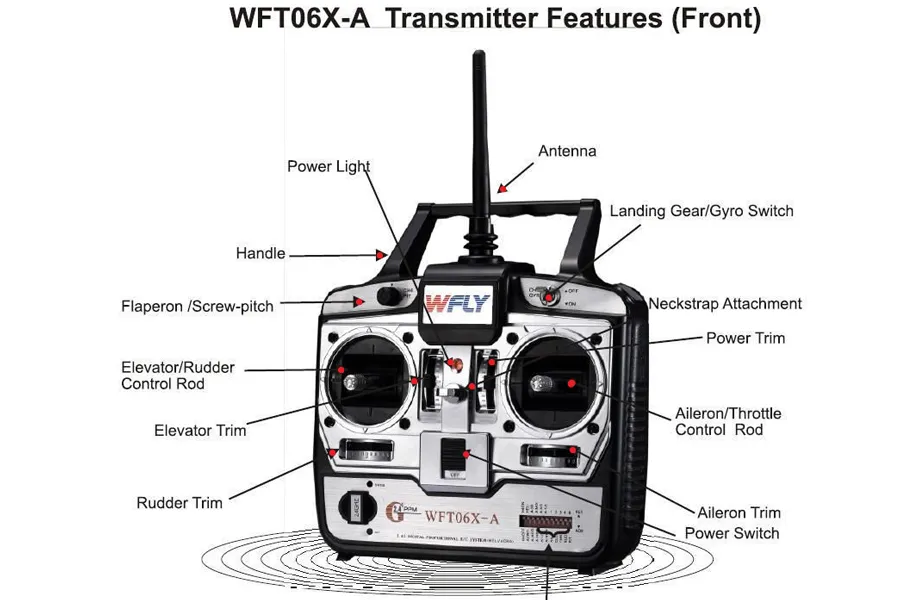
Radio controller Recommendation
Beginner Recommendation: RadioMaster Pocket Radio Controller
If you’re buying your first FPV radio controller, the RadioMaster Pocket is a practical starting point for pilots who want a compact radio without giving up the features needed for future FPV builds.
The Pocket is available in ExpressLRS 2.4GHz and CC2500 versions. For a new FPV setup, the ELRS 2.4GHz version is the more straightforward choice when your drone uses a compatible 2.4GHz ELRS receiver. The radio also comes with Hall-effect gimbals, EdgeTX, a foldable antenna and removable stick ends, making it easy to use for both everyday flying and simulator practice.
The RadioMaster Pocket is not the only option. If you want to compare compact, simulator-focused and budget-friendly radios, see our Beginner FPV Radio Controller collection.
Explore Beginner FPV Radio Controllers →
The collection groups radios by use case, including simulator training, compact and portable controllers, and budget beginner options, so you can compare alternatives based on how you plan to fly.
Medium recommendation: Radiomaster TX12
If the budget is above five hundred you can consider getting a portable full-featured remote control, the construction and function of this type of remote control is basically the same as the professional control. In recent years, a number of manufacturers are actively iterating and upgrading. Such remotes are very suitable for entry or advancement.
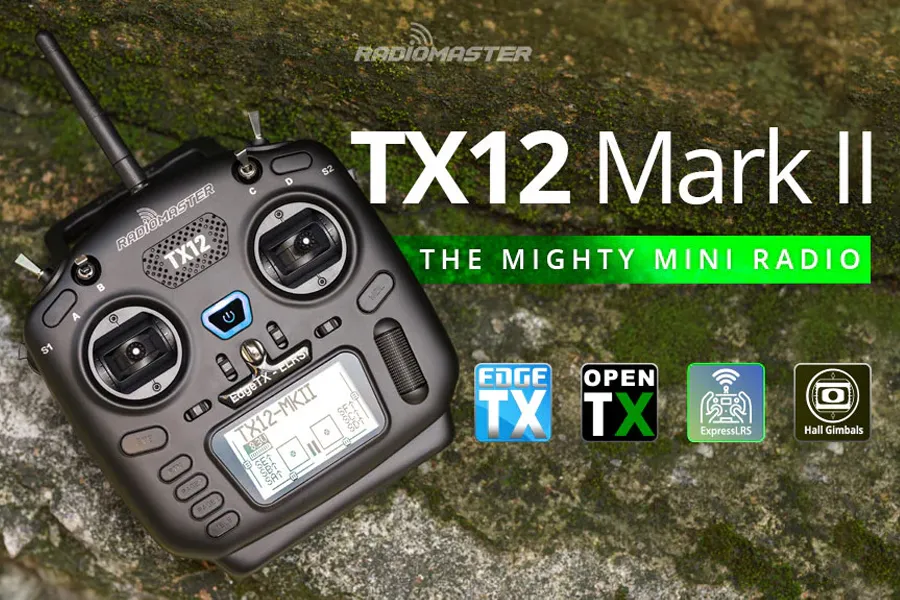
pilots with sufficient budget or long-term planning can directly choose expert remote control in one step. There are more models and types of expert remotes, and flyers have their own preferences.
Professional Recommendation: RadioMaster TX16S MK3 MAX
For experienced FPV pilots who want a full-size radio with extensive controls, advanced configuration and room to expand, the RadioMaster TX16S MK3 MAX is a strong option to consider.
The TX16S MK3 MAX combines a full-size control layout with a high-performance STM32 H7 processor, dual-band ELRS, AG02 CNC Hall sensor gimbals and a 5-inch touchscreen. It is designed for pilots who want more control options and a more advanced radio platform for long-term use.
Why Choose the TX16S MK3 MAX?
- Full-size control layout: Provides more physical switches, sliders and controls for complex model setups.
- Dual-band ELRS: The built-in RF system supports 2.4GHz and 900MHz, giving pilots more flexibility when configuring compatible long-range or general-purpose setups.
- AG02 CNC Hall gimbals: Designed for pilots who prioritize precise stick control and a refined gimbal feel.
- STM32 H7 processor: Provides fast EdgeTX operation and supports advanced radio configuration.
- 5-inch touchscreen: Makes model setup, configuration and EdgeTX navigation easier to manage.
- Up to 16 channels: Provides additional control channels for complex FPV and other RC models.
- JR-compatible module bay: Allows additional RF modules to be used when required.
- Foldable dual antennas: Makes the full-size transmitter easier to transport and store.
The TX16S MK3 MAX is one option within MEPSKING’s professional radio controller selection. If you want to compare full-size, compact professional and other advanced radio controllers, explore our Professional FPV Radio Controllers collection.
Explore Professional FPV Radio Controllers →
The collection includes full-size and compact professional radios, allowing you to compare different form factors, protocols, gimbals and control configurations before choosing a transmitter.
How to choose the radio controller?
There are several factors to evaluate before choosing a transmitter:
- Radio protocol
- Frequency
- Radio size and ergonomics
- Gimbal quality
- Channels and switches
- Firmware and programmability
- Receiver compatibility
- Battery life
- Your flying style and budget
You don’t need the most advanced option in every category. The right combination depends on your actual use case.
Choose the Right FPV Radio Protocol
An FPV radio protocol is the communication system that sends control signals between your transmitter and the receiver installed on your drone.
The basic control chain is: Transmitter (TX) → Radio Link → Receiver (RX) → Flight Controller → ESCs & Motors
Different protocols use different communication technologies, packet rates, frequencies, firmware ecosystems, and configuration methods. Most importantly, your radio protocol determines which receivers you can use.
ELRS vs Crossfire vs FrSky
| Protocol | Main Strength | Main Consideration | Best For |
| ExpressLRS (ELRS) | Low latency, long range, wide hardware selection | Initial setup can take some learning | Most FPV pilots |
| TBS Crossfire | Reliable long-range control | Higher hardware cost | Long-range FPV |
| FrSky | Large legacy ecosystem | Compatibility can be confusing | Existing FrSky users |
ExpressLRS (ELRS)
ExpressLRS, commonly called ELRS, is a popular choice for modern FPV.
It is suitable for:
- Beginners
- Freestyle
- Racing
- Cinewhoops
- Long-range flying
- General FPV
Key advantages include:
- Low latency
- Long-range capability
- Small and affordable receivers
- Wide hardware availability
- Large community support
- Multiple frequency options
If you want one radio system that can support different types of FPV flying as you gain experience, ELRS is a strong starting point.
The main downside is that the initial setup can be less straightforward for someone completely new to FPV.
TBS Crossfire
TBS Crossfire is particularly well known for reliable long-range control.
It can be a good choice for pilots who prioritize:
- Long-range flying
- Flying around terrain and obstacles
- Reliable control at greater distances
- Established long-range equipment
The trade-offs are higher receiver cost and a smaller hardware ecosystem compared with ELRS.
If long-range flying is not your primary goal, you may not need Crossfire.
FrSky
FrSky has been widely used in RC and FPV for years.
It can still make sense if you already own FrSky receivers or are maintaining an existing fleet.
However, different FrSky systems and receiver generations can have compatibility differences, so new pilots should check compatibility carefully before buying.
For a completely new FPV build, ELRS is generally the simpler starting point.
Which Protocol Should You Choose?
Choose ELRS if:
- This is your first FPV radio
- You want flexibility for future builds
- You want affordable receivers
- You fly freestyle, racing, or general FPV
- You want a modern and widely supported ecosystem
Choose Crossfire if:
- Long-range is your primary use
- You prioritize reliable control over maximum hardware choice
- Higher receiver cost is acceptable
Choose FrSky if:
- You already own compatible FrSky receivers
- You are maintaining older FPV builds
If you’re still unsure, ELRS is the safest starting point for most new FPV pilots.
Not sure whether ELRS, Crossfire, FrSky or a 4-in-1 radio fits your setup?
Explore our FPV Radio Protocols to compare radio systems, frequency options and compatible FPV radios.
Choose the Right Frequency
One common mistake is confusing the frequency used by your radio control link with the frequency used by your FPV video system.
For radio control, the important comparison is often 2.4GHz vs 900MHz, particularly when looking at ELRS or Crossfire systems.
2.4GHz is an excellent all-around choice for:
- 5-inch freestyle
- Racing
- Cinewhoops
- General FPV
- Beginner builds
- Everyday flying
Its hardware is compact and widely available, making it a practical choice for most pilots.
900MHz systems can be attractive for pilots who prioritize:
- Long-range flying
- Better penetration
- Flying in areas with more obstacles
- Large outdoor environments
The trade-off is that 900MHz equipment can require larger antennas and may not be necessary for ordinary freestyle or racing.
Choose 2.4GHz if you are unsure. For most FPV pilots, a 2.4GHz ELRS radio provides more than enough capability without adding unnecessary complexity.
Choose the Right Radio Size and Form Factor
Radio size affects portability, grip comfort, stick control, and how easy the transmitter is to carry.
There are three broad categories to consider:
Compact Radio
Compact radios are easy to carry and work well for pilots who prioritize portability.
They are suitable for:
- Beginners
- Travel
- Simulator practice
- Small hands
- Micro FPV drones
- Pilots who prefer a compact grip
A compact transmitter can also be a good option if you regularly carry your FPV equipment in a small backpack.
Mid-Size Radio
Mid-size radios offer a balance between portability and ergonomics.
They are a good choice for pilots who:
- Fly frequently
- Want comfortable gimbals
- Fly larger drones
- Want one radio for multiple builds
- Prefer more controls without a very large transmitter
Full-Size Radio
Full-size radios generally provide larger gimbals and more physical controls.
They are suitable for:
- Frequent pilots
- Freestyle
- Racing
- Long flying sessions
- Pinch-style pilots
- Users who also operate other RC models
When choosing between compact and full-size radios, don’t assume that bigger is automatically better.
Choose the size that feels comfortable in your hands and matches the way you fly.
Compact vs Full-Size FPV Radio
If you’re still unsure about transmitter size, use this comparison:
| Feature | Compact | Mid-Size | Full-Size |
|---|---|---|---|
| Portability | High | Medium | Lower |
| Travel | Excellent | Good | Moderate |
| Hand size | Small–Medium | Medium | Medium–Large |
| Gimbal size | Compact | Medium/Large | Large |
| Long sessions | Good | Very Good | Excellent |
| Physical controls | Fewer | Moderate | More |
| Simulator use | ✓ | ✓ | ✓ |
| Multiple RC models | Limited | Good | Excellent |
Choose compact if portability is your priority. Choose mid-size or full-size if comfort, stick control, and long-term use are more important.
Choose the Right Gimbals
Gimbals are one of the most important parts of a radio controller because they directly affect stick feel and control precision.
Hall-Effect Gimbals
Hall-effect gimbals use magnetic sensing technology and are found on many modern mid-range and high-end transmitters.
Potential benefits include:
- Smooth stick movement
- Precise control
- Consistent feel
- Good long-term durability
If you fly frequently or spend a lot of time practicing in a simulator, better gimbals can be a worthwhile investment.
Potentiometer Gimbals
Traditional potentiometer gimbals are still found on some budget transmitters.
They can be perfectly adequate for:
- Beginners
- Casual flying
- Budget builds
- Initial simulator practice
If you expect to keep the same radio for several years, however, upgrading to a transmitter with higher-quality gimbals may provide a better long-term experience.
Choose Your Control Style: Thumb or Pinch
Your preferred grip can affect which radio feels most comfortable.
Thumb Flying
Thumb pilots primarily control both sticks with their thumbs.
This can work particularly well with:
- Compact radios
- Gamepad-style transmitters
- Beginners
- Casual pilots
Pinch Flying
Pinch pilots use their thumb and index finger to control the sticks.
Many experienced FPV pilots prefer this style because it provides a different level of stick control and precision.
If you prefer pinch flying, consider a radio with comfortable full-size or larger gimbals.
The best radio is ultimately the one that feels natural and gives you consistent stick control.
How Many Channels Does an FPV Radio Need?
A channel is a control signal sent from the transmitter to the aircraft.
A basic FPV quadcopter needs four primary channels:
| Channel | Function |
| CH1 | Roll |
| CH2 | Pitch |
| CH3 | Throttle |
| CH4 | Yaw |
Additional channels can be used for:
- Arm / disarm
- Flight modes
- Beeper
- GPS Rescue
- Camera functions
- Other auxiliary controls
You may see radios advertised with many channels, but more channels do not automatically make a transmitter better for FPV.
For most quad pilots, the more important considerations are:
- Protocol
- Gimbal quality
- Ergonomics
- Battery life
- Switch layout
- Receiver compatibility
How Many Channels Does a Beginner Need?
For a typical FPV quad: 4 channels are required for the basic flight controls.
A few additional channels are useful for switches and auxiliary functions. A radio with 8 or more available channels gives most pilots enough room to expand their setup without requiring every channel from day one.
For most FPV pilots:
- 4 channels → basic flight (sticks)
- 2–4 extra channels → switches
Total recommended: 8–12 channels
This gives you enough flexibility without unnecessary complexity. More channels don’t make you a better pilot — but too few channels will limit you quickly. Choose a radio with at least 8 channels, even if you don’t use them all on day one.
2.4GHz vs 900MHz
| 2.4GHz | 900MHz | |
|---|---|---|
| General FPV | ✓ | |
| Freestyle | ✓ | |
| Racing | ✓ | |
| Micro FPV | ✓ | |
| Long-range focus | ✓ | |
| Antenna size | Usually smaller | Usually larger |
| Typical starting point | General FPV | Long-range |
Choose the Right Switches and Controls
In addition to the two main sticks, FPV radios can include:
- Two-position switches
- Three-position switches
- Buttons
- Rotary knobs
- Sliders
For a typical FPV quad, you may use switches for:
- Arm / disarm
- Flight modes
- Beeper
- GPS Rescue
- Other auxiliary functions
You don’t need a large number of switches for basic freestyle or racing.
If you also fly fixed-wing aircraft or other RC models, however, additional switches and knobs may become more useful.
Do You Need EdgeTX?
Many modern FPV transmitters use EdgeTX, an open-source radio operating system.
EdgeTX provides features such as:
- Model profiles
- Channel mapping
- Switch configuration
- Telemetry
- Voice alerts
- Custom functions
- Advanced radio configuration
For beginners, EdgeTX may look complicated at first.
You don’t need to learn every feature before your first flight.
The main benefit is that your transmitter can grow with you. As you gain experience, you can create different model profiles and customize controls to match your flying style.
If you plan to use one radio for multiple drones, EdgeTX can also make model management much easier.
Check Radio and Receiver Compatibility
Before buying an FPV radio, always check compatibility between the transmitter and receiver.
Check the Protocol
For example:
ELRS transmitter → ELRS receiver
Crossfire transmitter → Crossfire receiver
Different protocols cannot simply be bound to each other.
Check the Frequency
Make sure the transmitter and receiver use the appropriate frequency system.
For example: 2.4GHz ELRS transmitter → 2.4GHz ELRS receiver
Check Your Existing Drone Fleet
If you already own multiple drones, consider choosing a radio that uses the same protocol as your existing receivers. This allows you to use one transmitter across multiple builds.
Check the RF Module
Some radios have an internal RF module, while others can also accept an external module. If you already own an external module, make sure the transmitter has the appropriate module bay.
Consider Battery Life and Portability
Battery life becomes particularly important if you spend several hours flying outdoors.
Before buying, consider:
- Battery type
- Battery capacity
- Charging method
- Expected operating time
- Spare battery availability
- Overall radio weight
If you travel frequently, also consider the physical size of the transmitter.
A slightly smaller radio that you actually take everywhere can be more useful than a larger transmitter with features you rarely use.
Channel of the radio controller
A channel is simply one control signal sent from your radio to the drone. Every movement you make on the radio — sticks, switches, knobs — uses a channel. Each of the remote’s joysticks can be swung up, down, left and right, with two joysticks for a total of four channels. These four channels are mandatory — without them, the drone cannot fly.
| Channel | Function | What It Controls |
|---|---|---|
| Throttle | Up / Down (Left stick) | Increases or decreases motor speed |
| Yaw | Left / Right (Left stick) | Rotates the drone left or right |
| Pitch | Up / Down (Right stick) | Tilts the drone forward or backward |
| Roll | Left / Right (Right stick) | Tilts the drone left or right |
In addition to the sticks, FPV radios have toggle switches, buttons, and knobs. Each switch or button counts as one additional channel.
Two-Position vs Three-Position Switches:
- Two-position switch
- On / Off
- Common for arming
- Three-position switch
- Mode 1 / Mode 2 / Mode 3
- Common for flight modes
Even if a switch has multiple positions, it still uses only one channel.
During the actual flight, we also have to bind the various channels of the remote control to the aircraft. Taking the most common American hand as an example, the binding mechanism of each channel of the remote control is as follows:
| Throttle | Yaw |
|---|---|
 |  |
| Increase all rotor speeds | turn left and right |
| Pitch) | Roll |
|---|---|
 |  |
| swing back and forth | swing left and right |
Knobs and Buttons (Do You Need Them?)
Some radios include:
- Rotary knobs
- Momentary buttons
These also count as channels, but:
- Rarely used in freestyle or racing
- More common in fixed-wing or cinematic setups
Beginners do not need to worry about these.
Channel Mapping (Mode 2 / “American Style”)
Most FPV pilots use Mode 2, sometimes called “American style” control. Mode 2 Channel Layout:
| Stick | Movement | Function |
|---|---|---|
| Left Stick | Up / Down | Throttle |
| Left Stick | Left / Right | Yaw |
| Right Stick | Up / Down | Pitch |
| Right Stick | Left / Right | Roll |
This is:
- The global FPV standard
- The default in most simulators
- What most tutorials assume
New pilots should always start with Mode 2.
How to Bind a Radio to a Receiver (Beginner-Friendly Guide)
Binding is the process that allows your radio transmitter and receiver to recognize and communicate with each other.
If you follow the steps in order, binding is simple. Most problems happen because one step is skipped.
Step 1: Confirm the Protocol
Before doing anything else: Make sure the radio protocol matches the receiver
- ELRS radio → ELRS receiver
- Crossfire radio → Crossfire receiver
Different protocols cannot bind to each other.
Step 2: Power the Receiver Correctly
- Install the receiver on the drone
- Power it via:
- USB (if supported), or
- Flight controller + battery
Many receivers will not enter bind mode without stable power.
Step 3: Put the Receiver Into Bind Mode
Common methods:
- Press and hold the bind button while powering on
- Power-cycle the drone several times (ELRS auto-bind)
Look for:
- Fast blinking LED (bind mode)
- Solid LED (bound)
Step 4: Put the Radio Into Bind Mode
- Open the Model settings
- Select the correct RF protocol
- Enable Bind
Keep the radio close to the receiver during binding.
Step 5: Confirm Successful Binding
Binding is successful when:
- Receiver LED becomes solid
- Radio shows telemetry or signal feedback
After binding:
- Remove propellers
- Test stick inputs in Betaflight
Common Binding Problems (Quick Fixes)
| Problem | Likely Cause |
|---|---|
| Won’t bind | Protocol mismatch |
| Binds but no control | Channel mapping incorrect |
| Disconnects | Firmware mismatch |
| No LED change | Receiver not powered |
Radio controller connection and configuration instructions
Note: For remote control with detachable antenna, you need to install the antenna before starting the remote control, otherwise it may cause the transmitter module to burn up!
Long press the remote control power-on button to start the remote control. For safety reasons, if the left throttle or toggle switch is not zeroed during power on, the power on process will be paused and wait for zeroing before you can start the system. The remote control’s error prompts are as follows:
- Throttle not zeroed (Throttle Warning):Bring the throttle rocker to the bottom.
- Switch Warning:Try to toggle each rocker in turn until the error message disappears.
Wired connection
All mainstream remote controls on the market come with USB ports, which can be directly connected to the computer via MicroUSB cable or Type-C cable after booting. Some remotes will have 2~3 USB ports, which are used for charging, emulator handle or built-in file transfer, etc. You need to pay attention to the distinction before wiring.
FAQ
What is the best FPV radio controller for beginners?
For most beginners, a 2.4GHz ELRS radio is a good starting point. It offers a combination of low latency, good range, affordable receivers, and broad compatibility.
Is ELRS better than Crossfire?
Neither is universally better. ELRS is a strong all-around choice for most FPV pilots, while Crossfire remains a strong option for pilots who prioritize long-range control and reliability.
Should I buy a 2.4GHz or 900MHz FPV radio?
Choose 2.4GHz for general FPV, racing, freestyle, and cinewhoops. Consider 900MHz when long-range flying and penetration are major priorities.
How many channels does an FPV radio need?
Four channels are required for the basic flight controls: throttle, yaw, pitch, and roll. Additional channels can control arming, flight modes, GPS Rescue, beepers, and other functions.
Do I need an ELRS receiver with an ELRS radio?
Yes. Your transmitter and receiver need to use compatible communication protocols.
Are Hall-effect gimbals worth it?
If you fly frequently, Hall-effect gimbals can be a worthwhile upgrade because they provide smooth and precise stick control and are designed for long-term use.
What is EdgeTX?
EdgeTX is an open-source operating system used by many modern RC transmitters. It provides model management, channel configuration, telemetry, switches, voice alerts, and extensive customization.
Can one FPV radio control multiple drones?
Yes. You can generally use one transmitter with multiple drones as long as their receivers are compatible with the transmitter’s protocol and each model is configured correctly.
The driver downgrade method is as follows:
- Turn on the remote control and connect to the computer using the USB cable
- Open Device Manager
- Select libusb-win32 devices
- Right-click on BETTER_USB_HS
- Select Let me select from the list of available drivers on the computer
- Select HID-COMPLIANT GAME CONTROLLER