
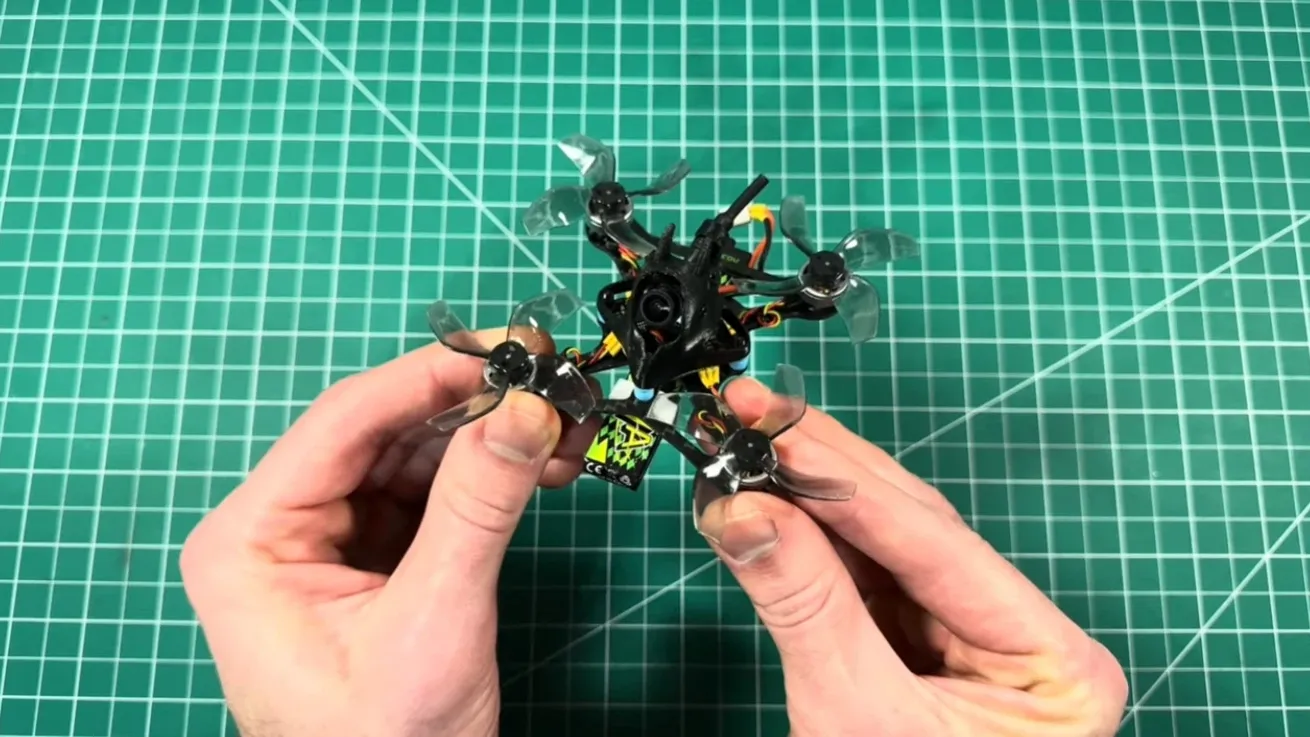
Building an FPV drone doesn’t have to be expensive. In fact, with the right parts and a few smart choices, you can build a fully functional Micro FPV drone for around $60.
This guide walks you through a complete 1S micro FPV drone build, including the parts list, assembly process, Betaflight configuration, and real-world flight performance.
Whether you’re new to FPV or simply want a lightweight quad for indoor practice, this budget micro FPV build is one of the best ways to get started.
Can You Build an FPV Drone for $60?
Yes, you can build a working FPV drone for about $60 using a lightweight 1S micro drone setup. By choosing an AIO flight controller with built-in receiver and VTX, budget motors, and a 2-inch frame, it’s possible to assemble a beginner-friendly FPV quad that can fly both indoors and outdoors. While the performance is modest compared to larger drones, it is more than enough for learning FPV flying and basic freestyle practice.
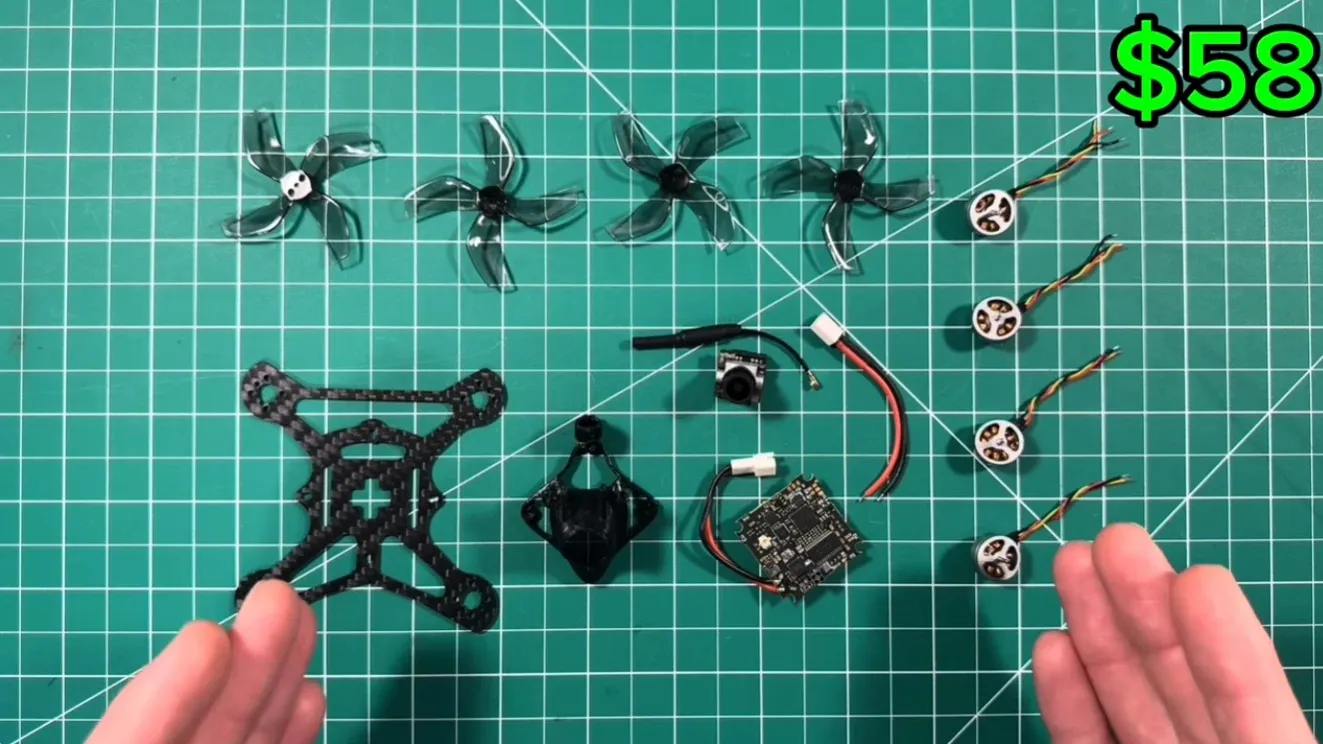
Parts List for the $60 Budget Micro FPV Build
Here are the components used in this build. All parts were selected for low cost, reliability, and beginner friendliness.
| Component | Product | Approx Price |
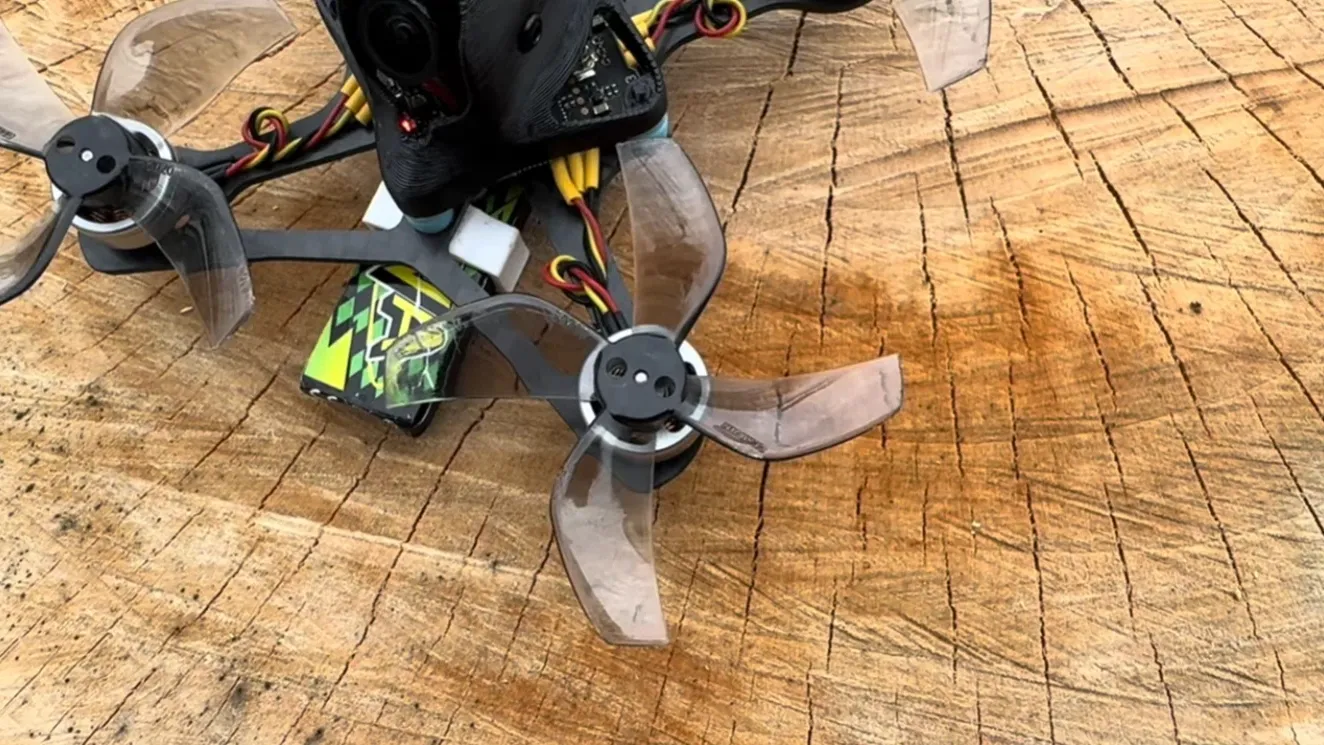
| Frame | BetaFPV Twiglet 2″ Frame | $4 |
| Flight Controller | MEPSKING 1S 7A AIO Flight Controller | $25-$28 |
| Motors | 15000KV 1103 Micro Brushless Motors | $16 |
| Propellers | Gemfan D51 2020 4-Blade Props | $3 |
| Camera | Caddx Ant Nano FPV Camera | $15 |
| Canopy | 3D Printed Canopy + Battery Mount | $4 |
About $70 before discounts
With coupons and sales, the total drops to roughly: $58–$60
- AliExpress runs really good deals every couple of weeks. So, simply add everything to your cart and wait for coupon codes to show up on the homepage. 9 off 69 puts it at 61.
- For MEPSKing, simply use the code nerd for 10% off your entire order, which will take off at least $28 for the flight controller. And there you have it. About $58 for all these parts.
This makes it one of the cheapest FPV drone builds currently possible.
Why the MEPSKing 1S AIO Flight Controller Makes This Build Possible
The key component that enables this ultra-budget build is the MEPSKING 1S 7A AIO flight controller.
Unlike traditional setups that require separate components, this board integrates several systems into one compact unit.
Main features include:
- Built-in ExpressLRS receiver
- Integrated 5.8GHz VTX
- Lightweight 1S design
- BT2.0 battery connector
- Compact AIO layout
Because of this integration, you save money, reduce wiring complexity, and keep the quad extremely lightweight.
The only limitation is the 50mW VTX output power, which limits long-range flying. However, it’s still more than enough for park flying and indoor practice.
If It’s Out of Stock
While this board may not always be available, it represents the ideal all-in-one solution for lightweight 1S builds.
Alternatives such as the T-Hobby F411 1S 6A AIO Flight Controller offer similar integration, combining FC, ESC, ELRS receiver, and VTX into a single compact unit.
Because of this integration, you save money, reduce wiring complexity, and keep the quad extremely lightweight.
Recommended FPV Equipment for Beginners
Before flying your micro FPV drone, you’ll need a few essential pieces of equipment. These include a radio transmitter, FPV goggles or monitor, a battery charger, and several 1S LiPo batteries.Below are some of the best budget FPV equipment recommendations for beginners.
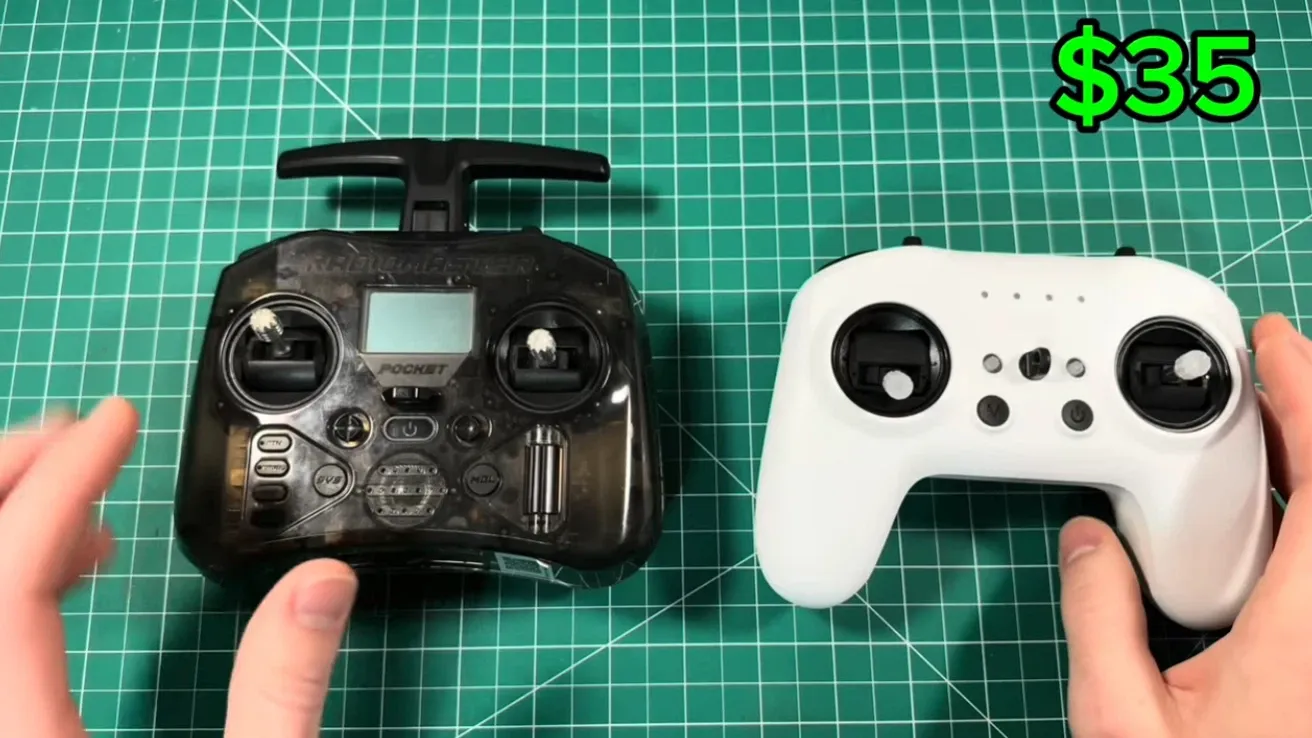
Budget FPV Transmitter: RadioMaster T8L
One of the best budget transmitters currently available is the RadioMaster T8L. It typically costs between $35 and $50, making FPV flying more accessible than ever.
Despite its low price, the T8L feels surprisingly solid in the hands. It has a bit of weight to it, which gives it a premium feel, and the gimbals are smooth and responsive, making it comfortable for longer flying sessions.
The radio includes all the essential features beginners need while eliminating unnecessary extras that would normally drive up the cost.
T8L vs RadioMaster Pocket
Another popular option is the RadioMaster Pocket, which offers slightly higher performance.
| Feature | RadioMaster T8L | RadioMaster Pocket |
| Transmission Power | 100mW | 250mW |
| Screen | Yes | Yes |
| Antenna | Internal | External |
For most beginner pilots, the T8L provides more than enough performance for everyday FPV flying. However, if you plan to explore long-range FPV in the future, the Pocket’s higher transmission power may be worth considering.
When purchasing your transmitter, make sure to choose the ELRS version, since most modern quadcopters—including the one in this build—use the ExpressLRS protocol.
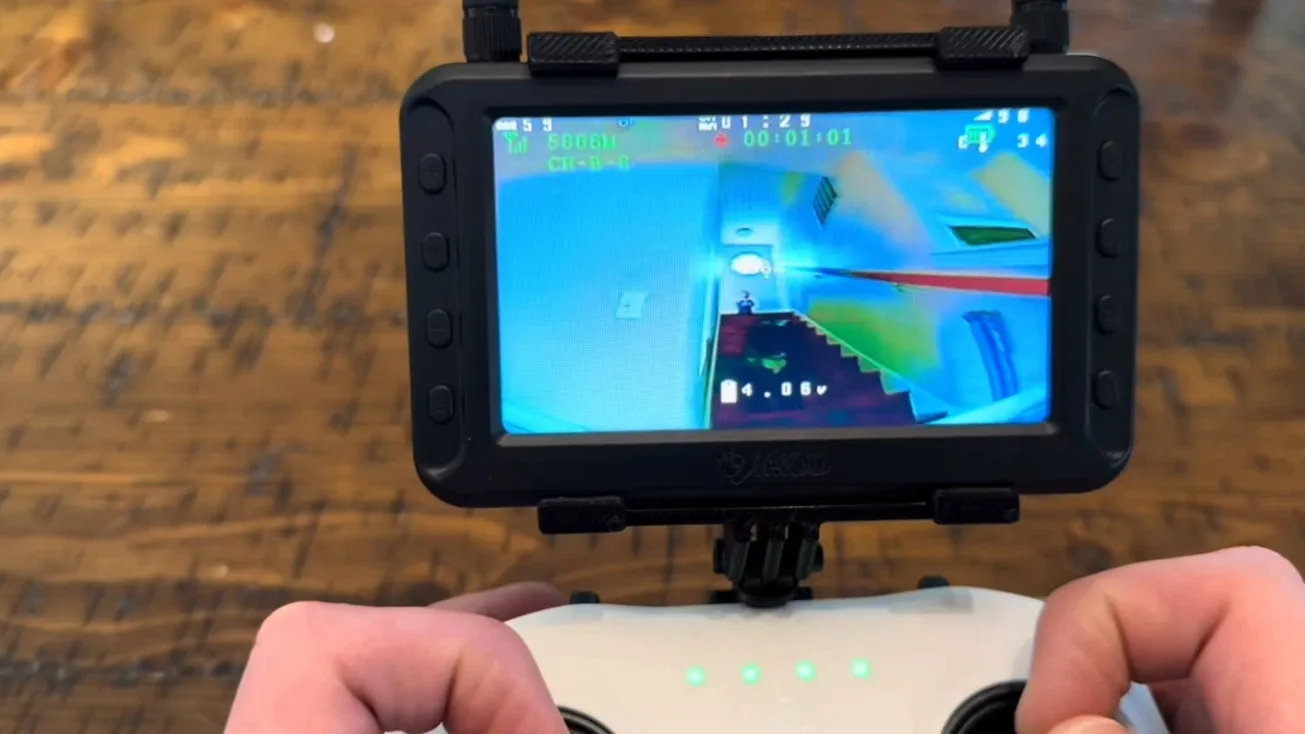
FPV Goggles vs Monitor for Beginners
Many beginner guides recommend the Eachine EV800D goggles, but they usually cost around $125, which is quite expensive considering they are still basic box-style goggles.
A more affordable alternative is to start with a simple 5.8GHz FPV monitor.
These monitors are typically about half the price and still provide everything needed to get in the air.
Common features include:
- replaceable battery
- built-in DVR recording
- tripod mounting options
- removable antennas
While a monitor doesn’t provide the same immersive experience as goggles, it’s still a great entry point into FPV flying.
Better Budget Goggles Option
If you prefer a more immersive FPV experience, it might be worth spending a little more on higher-quality goggles. A great option is the Skyzone Cobra SD, which typically costs around $150.
Compared to cheaper box goggles, the Skyzone Cobra SD offers:
- better image quality
- improved comfort
- more reliable video reception
For many pilots, this makes it a better long-term investment than cheaper beginner goggles.
Battery Chargers for 1S FPV Batteries
Charging your batteries is another essential part of the FPV setup.
A very cheap option is a basic USB charger, which can cost as little as $4.50. These chargers are simple and easy to use but offer very limited features.
A more advanced option is the Vifly 1S charger, which usually costs around $35.
The Vifly charger includes several useful features:
- built-in voltage display
- adjustable charging current (0.1A–1.3A)
- support for PH2.0 and BT2.0 connectors
- compatibility with standard and high-voltage 1S batteries
One particularly useful feature is the screen, which shows the voltage of each connected battery, making it much easier to monitor charging status.
If your budget allows, the Vifly charger is the better choice. However, the USB charger will still work fine for beginners.
Cheap 1S LiPo Batteries for Micro FPV Drones
Finally, you’ll need several 1S LiPo batteries to power your micro FPV drone.
One of the cheapest places to buy them is HobbyKing, where 1S batteries can cost only $2–$3 each.
These ultra-budget batteries are not the highest-performing options available, and the long battery leads can sometimes be inconvenient. However, considering the price, they are still a great option for beginners who want to practice flying without worrying about damaging expensive batteries.
If you want better performance and higher quality, brands like Tattu offer more premium 1S battery options.
Step-by-Step Guide: Building the Micro FPV Drone
Once all parts arrive, you can begin assembling the quad.
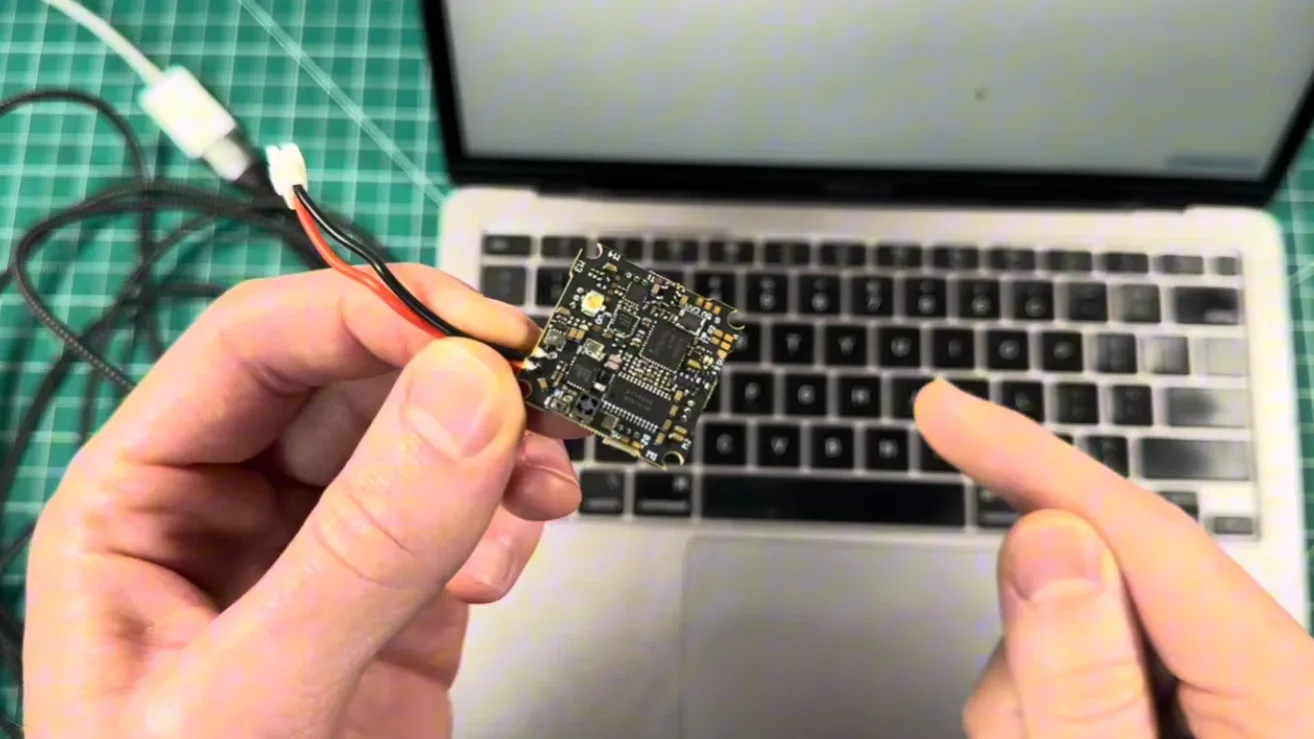
Step 1: Test the Flight Controller
Before soldering anything, connect the flight controller to your computer and open Betaflight Configurator.
Check that:
- the board powers up
- sensors are working
- firmware loads correctly
Testing first prevents wasted time if a component arrives defective.
Step 2: Assemble the Frame
Start by installing the rubber grommets onto the flight controller. These help reduce vibration during flight.
Next:
- mount the flight controller onto the frame
- install the canopy mounting screws
- confirm the camera position
At this stage, the drone structure should already start to take shape.
Step 3: Install the Motors
Attach the motors using M1.4 × 3mm screws.
Be careful when selecting screws. If they are too long, they can touch the motor windings and permanently damage the motor.
In some micro builds, motor connectors may not fit the frame. In that case, the wires can simply be soldered directly to the flight controller pads.
Step 4: Solder the Components
Soldering is the most technical step of the build.
You will need:
- soldering iron
- solder wire
- Flux
- helping hands tool
A good temperature setting is around 370°C.
Components that require soldering include:
- motor wires
- battery connector
- camera wires
Flux is extremely helpful when working with small pads, as it helps the solder flow smoothly and prevents bridges.
Step 5: Install the Camera and Canopy
The FPV camera typically connects using three wires:
- 5V power
- Ground
- video signal
After soldering these wires, mount the camera inside the canopy and secure it with screws.
At this point, the drone hardware should be fully assembled.
Basic Betaflight Setup for Beginners
After building the drone, you need to configure it using Betaflight.
Some of the most important settings include:
Gyro Calibration
Place the drone on a level surface and click Calibrate Accelerometer.
Receiver Binding
Bind the receiver to your radio inside the Receiver tab.
Once connected, moving your sticks should show movement in Betaflight.
Flight Modes
Assign switches for:
- Arm
- Angle mode
- Beeper
Angle mode is useful for beginners because it stabilizes the quad automatically.
Motor Direction
Always remove the propellers before testing motors.
Use the motor direction wizard to ensure each motor spins correctly.
VTX Settings
Configure the video transmitter with:
- Band
- Channel
- power level
Most budget micro builds use 50mW VTX power.
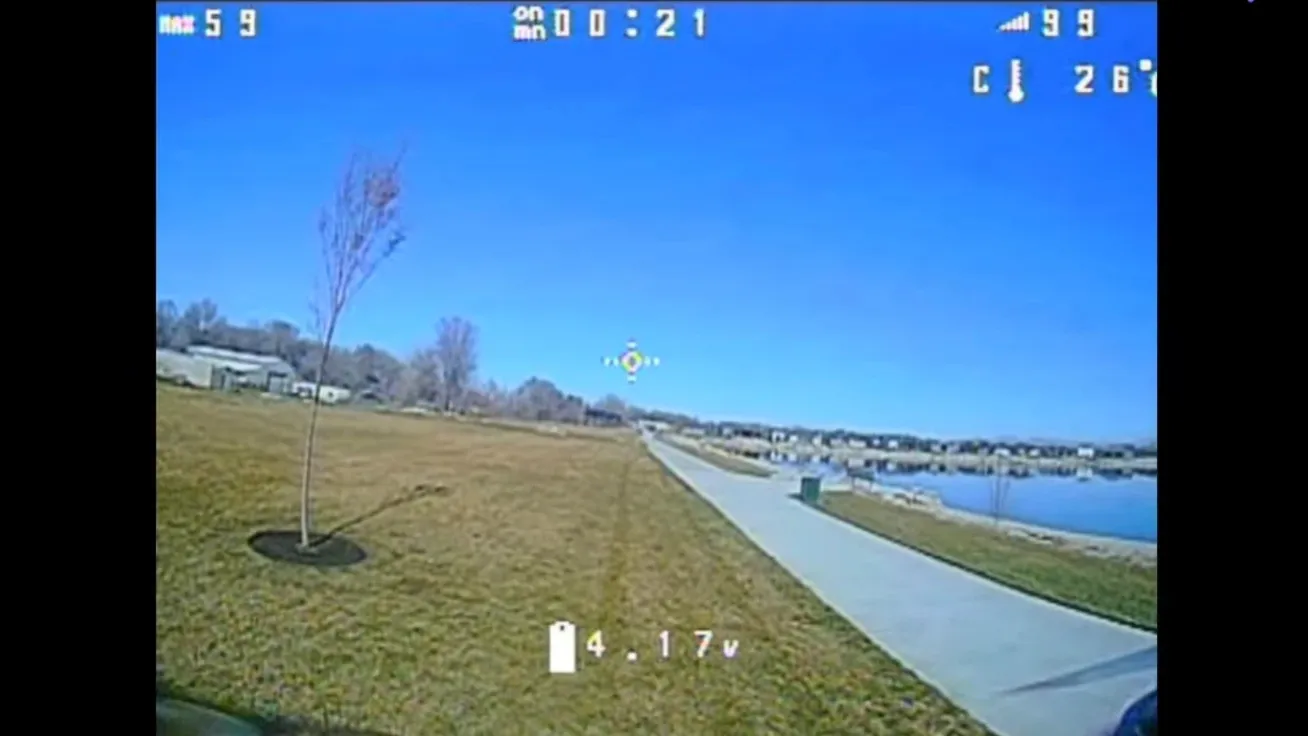
Real-World Flight Performance
After completing the build and configuration, the drone was tested indoors and outdoors.
Indoor Flight
With prop guards installed, the drone performs very well indoors.
Advantages include:
- quiet operation
- easy control
- durable frame
Crashes inside a house usually cause little or no damage.
Outdoor Flight
Outdoor performance is surprisingly capable for such a small quad.
However, the biggest limitation is video transmission range.
Typical usable range:
about 100 meters
Beyond that distance, the video signal begins to break up.
How to Improve FPV Video Range
One of the easiest upgrades is replacing the stock antennas.
Using a combination of:
- omni antenna
- patch antenna
can dramatically increase video range.
In testing, this setup nearly doubled the usable distance without increasing VTX power.
This highlights an important FPV principle:
antenna quality often matters more than transmitter power.
Battery Options and Flight Time
Different batteries affect both flight time and performance.
Here are typical results from several 1S batteries.
| Battery | Flight Time |
| Turnigy 500mAh | ~3 minutes |
| Tattu 550mAh | ~4 minutes |
| BetaFPV Lava 680mAh | ~5 minutes |
Higher capacity batteries provide longer flight time but add extra weight.
For indoor flying, lighter batteries often feel more responsive.
Is a $60 FPV Drone Worth Building?
A budget micro FPV drone will never match the raw power of a 5-inch freestyle quad. However, it offers several important benefits:
- extremely low cost
- lightweight and safe
- beginner friendly
- great for indoor practice
For new pilots, this type of build is one of the best ways to learn:
- soldering skills
- Betaflight configuration
- FPV flying fundamentals
Even experienced pilots often keep micro drones for casual flying and practice.
FAQ: Budget Micro FPV Drone Build
How much does it cost to build an FPV drone?
The cost of building an FPV drone varies widely depending on size and components. A small micro FPV drone can cost around $60–$100, while a full 5-inch freestyle drone setup with goggles and radio can exceed $500.
What is the best FPV drone for beginners?
Micro FPV drones powered by 1S batteries are often the best choice for beginners. They are cheaper, safer to fly indoors, and easier to repair after crashes.
Do I need soldering skills to build an FPV drone?
Yes. Most FPV drone builds require basic soldering to connect motors, cameras, and battery leads. However, with practice and proper tools, the process becomes relatively easy.
How far can a 50mW FPV drone fly?
A typical 50mW analog FPV system can reach about 100 meters in open areas. Using better antennas or flying at higher altitude can extend the range further.
Can beginners build their own FPV drones?
Absolutely. Many FPV pilots start by building their own drones because it helps them understand how the system works and makes repairs much easier later.
Conclusion
Building a micro FPV drone for under $60 proves that getting into FPV flying doesn’t require a huge budget. With the right combination of affordable components, you can create a lightweight and capable quad that’s perfect for beginners.
This type of 1S micro build is ideal for learning the fundamentals of FPV, including soldering, Betaflight setup, and basic flight control. While it won’t match the power or range of larger 5-inch freestyle drones, it offers a safe, low-cost way to practice both indoors and outdoors.
For new pilots, a budget micro drone like this is often the best starting point. It’s cheap to repair, easy to carry, and incredibly fun to fly. As your skills improve, you can always upgrade to larger FPV builds—but this $60 quad is the perfect place to begin.
Content Inspiration:
This build guide was inspired by a micro FPV project demonstrated by the YouTube creator Mediocre Nerd. The original video walkthrough can be found here: https://www.youtube.com/watch?v=4nRgEmdwtJo. We expanded the guide with additional explanations and beginner-friendly setup instructions.